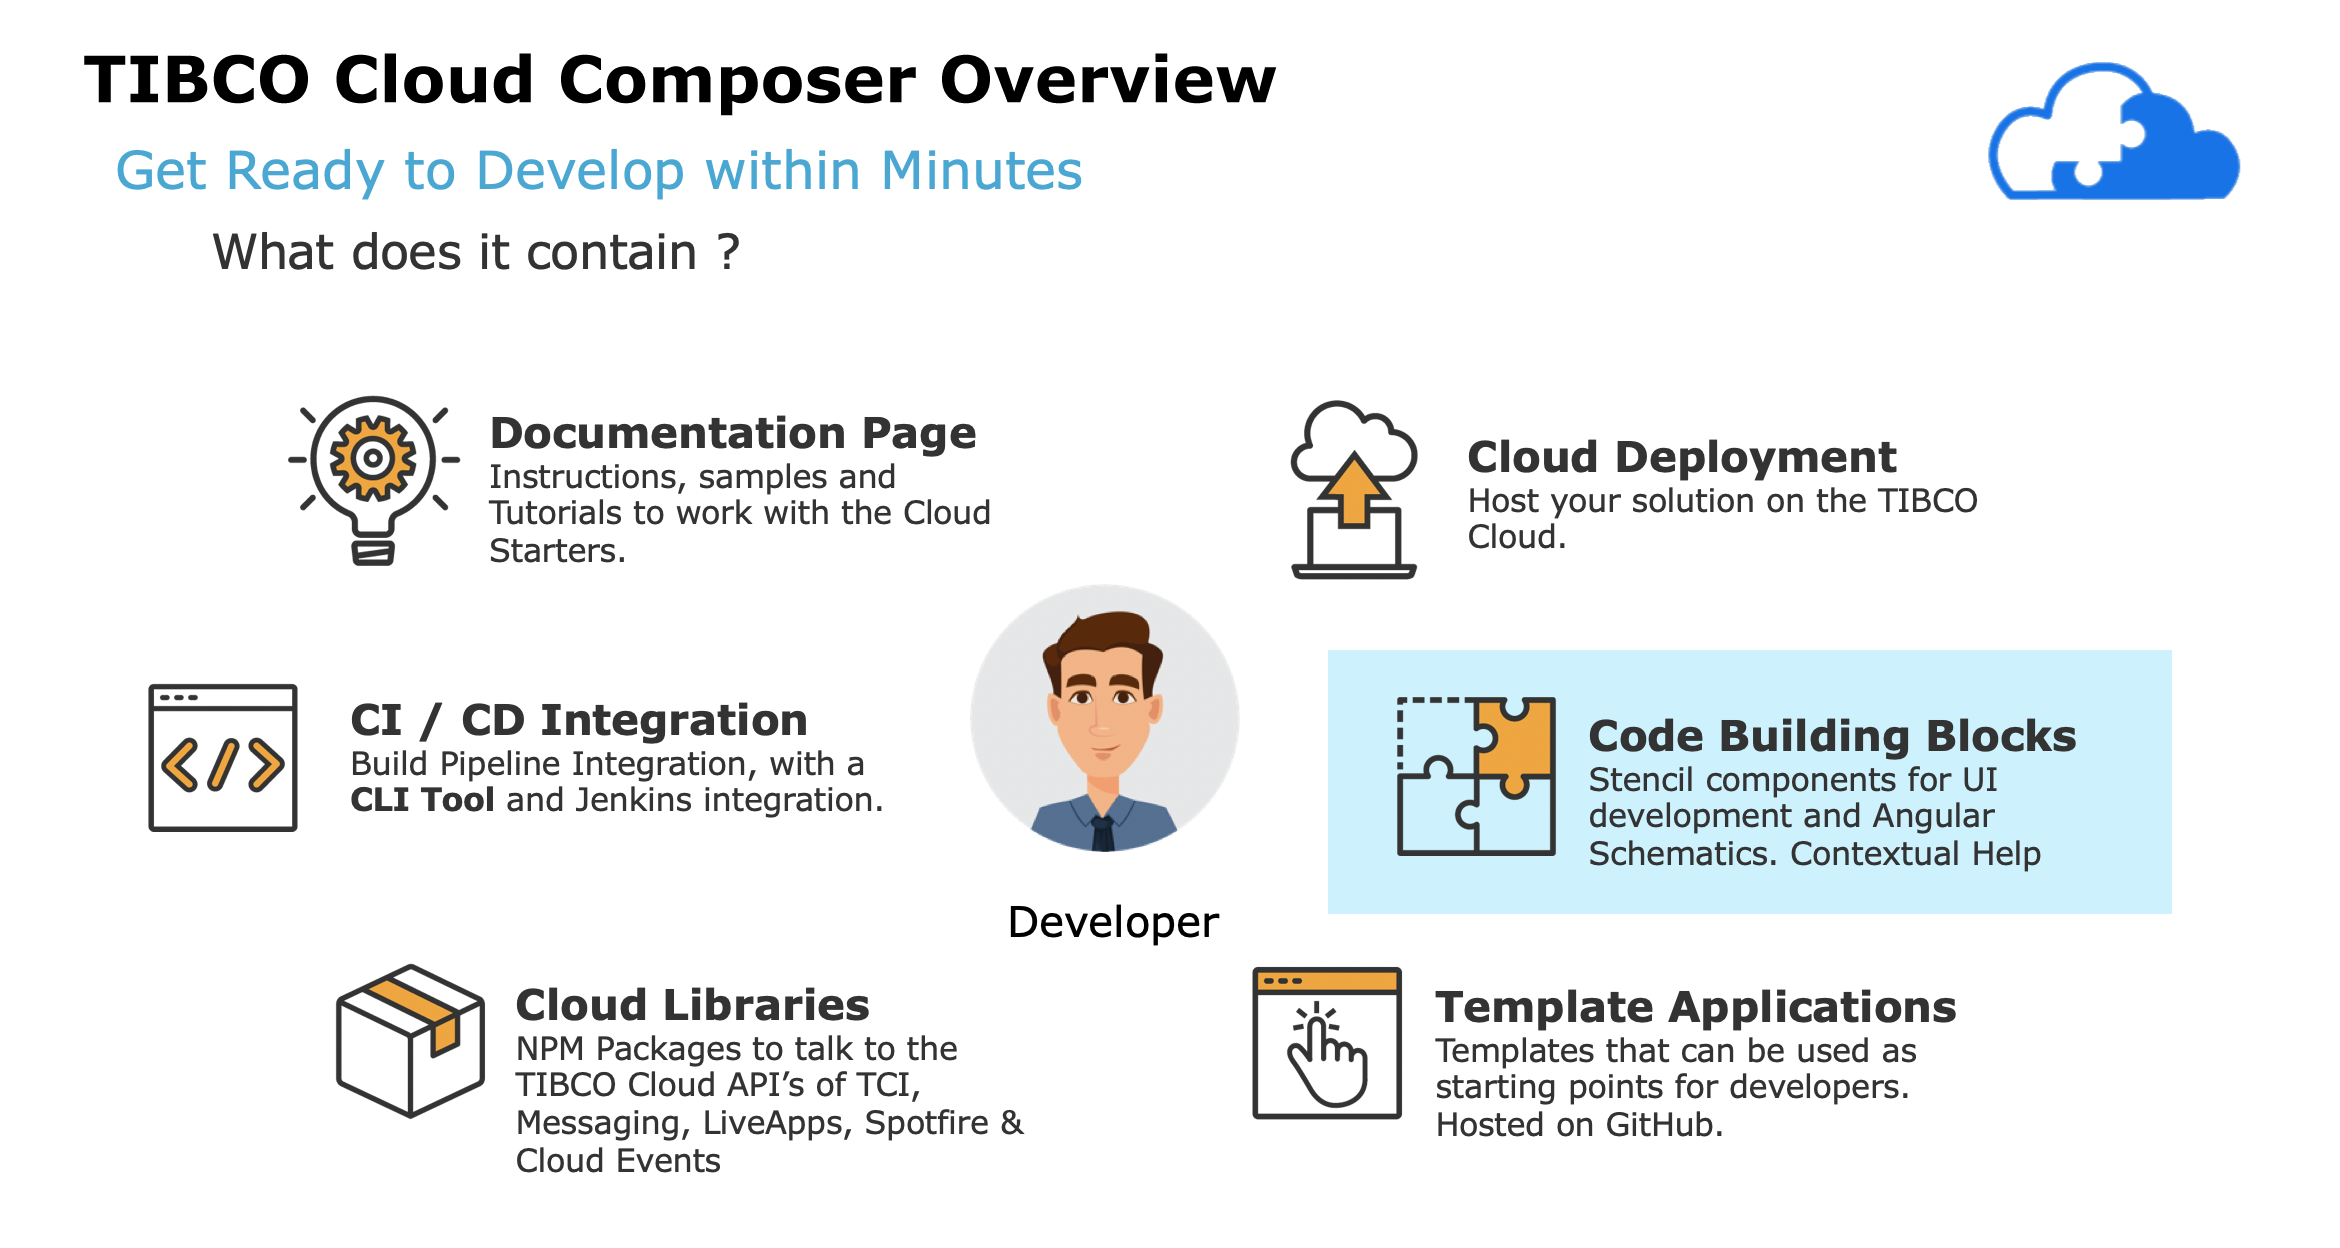
TCLI: Get started with the TIBCO Cloud Composer
Set up your own Cloud Application
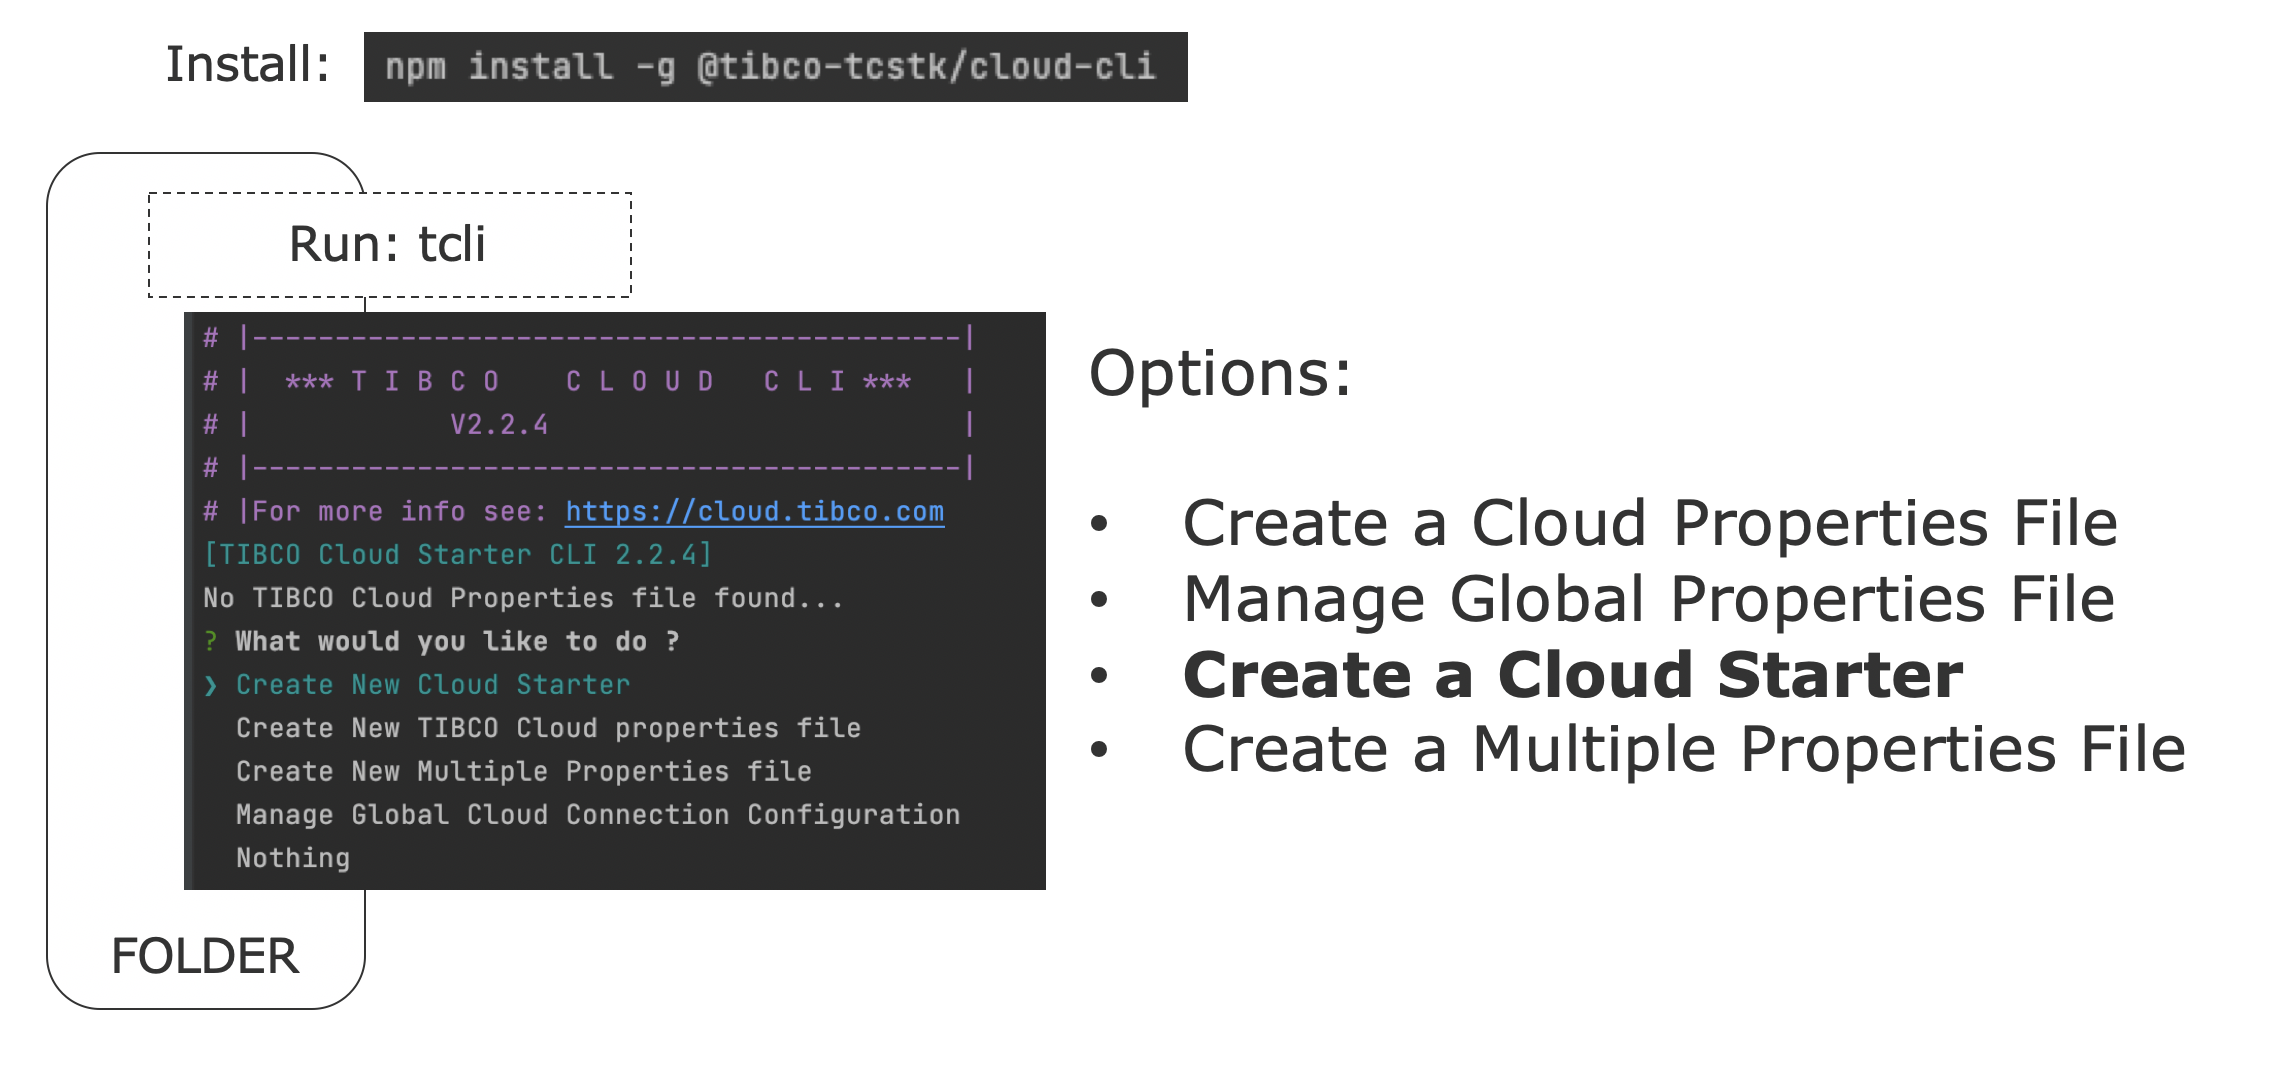
When you run the tcli in a folder without the tibco-cloud property file:
tcli
or
tcli new
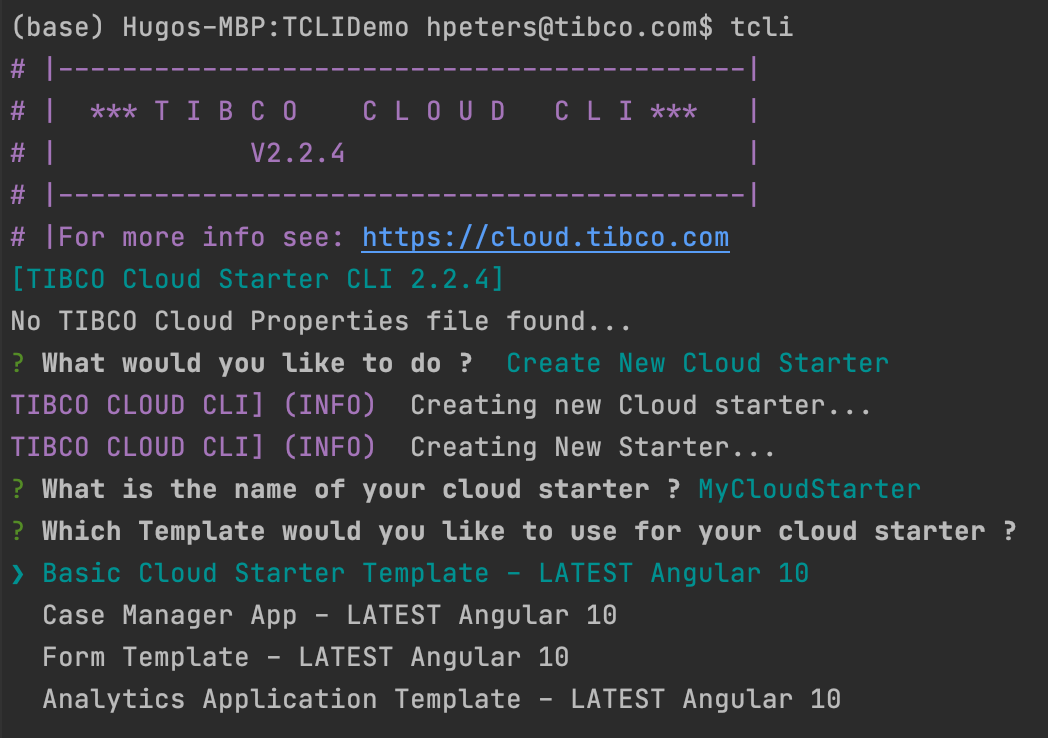
You have an option to Create a New Cloud Application. You will get into an interactive menu where you answer the following questions:
What is the name of your cloud application ?
Which Template would you like to use for your cloud application ?
For example:
Note: You can also provide the command to create a new cloud application inline (without interactions):
tcli new <name> [--template(-t)] <template-to-use>
When you choose the template to use the tcli will fetch the Cloud Application(from Git) based on that template. The tcli will create the following folder structure:
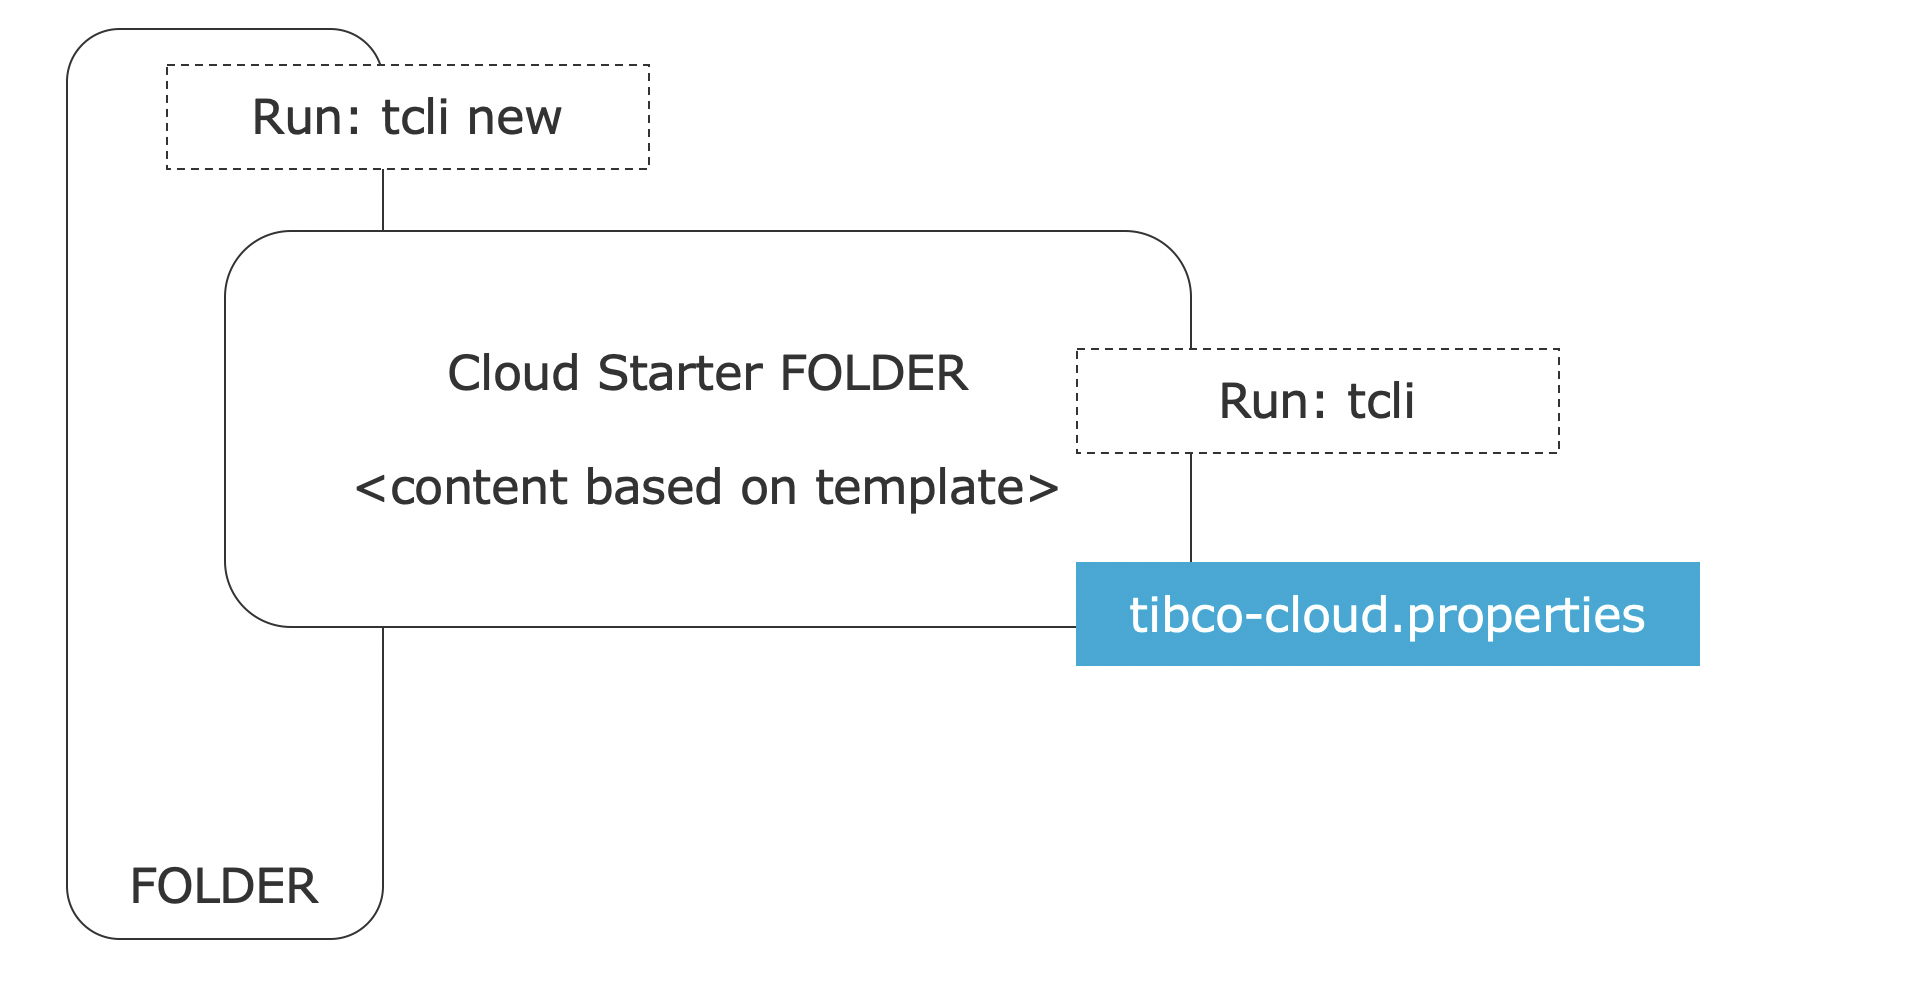
If you have a global configuration the tibco-cloud property file crated will contain USE-GLOBAL for your authentication values. Click here for more information on global configuration
If all was successfully, you will directly get into the interactive tcli menu in your newly created cloud application folder:
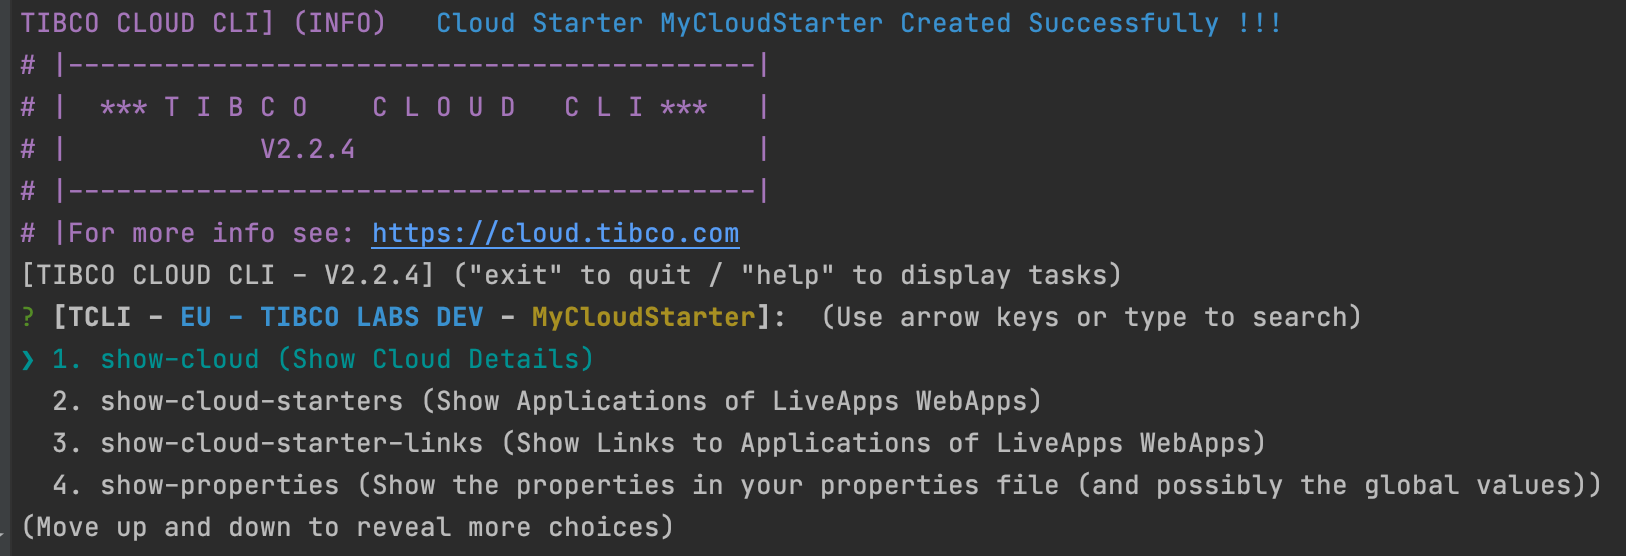
Note: If you exit the interactive menu now you will be back in the main folder from where you created the cloud application, and not in the cloud application folder. So if you type tcli again you would get the menu again that asks you to create a cloud application. To go back to your cloud application run:
cd <Cloud Application FOLDER>
Note: You can prevent the interactive tcli menu to come up after creating a cloud application with the --surpressStart flag (or short -s), for example:
tcli new <name> [--template(-t)] <template-to-use> --surpressStart(-s)
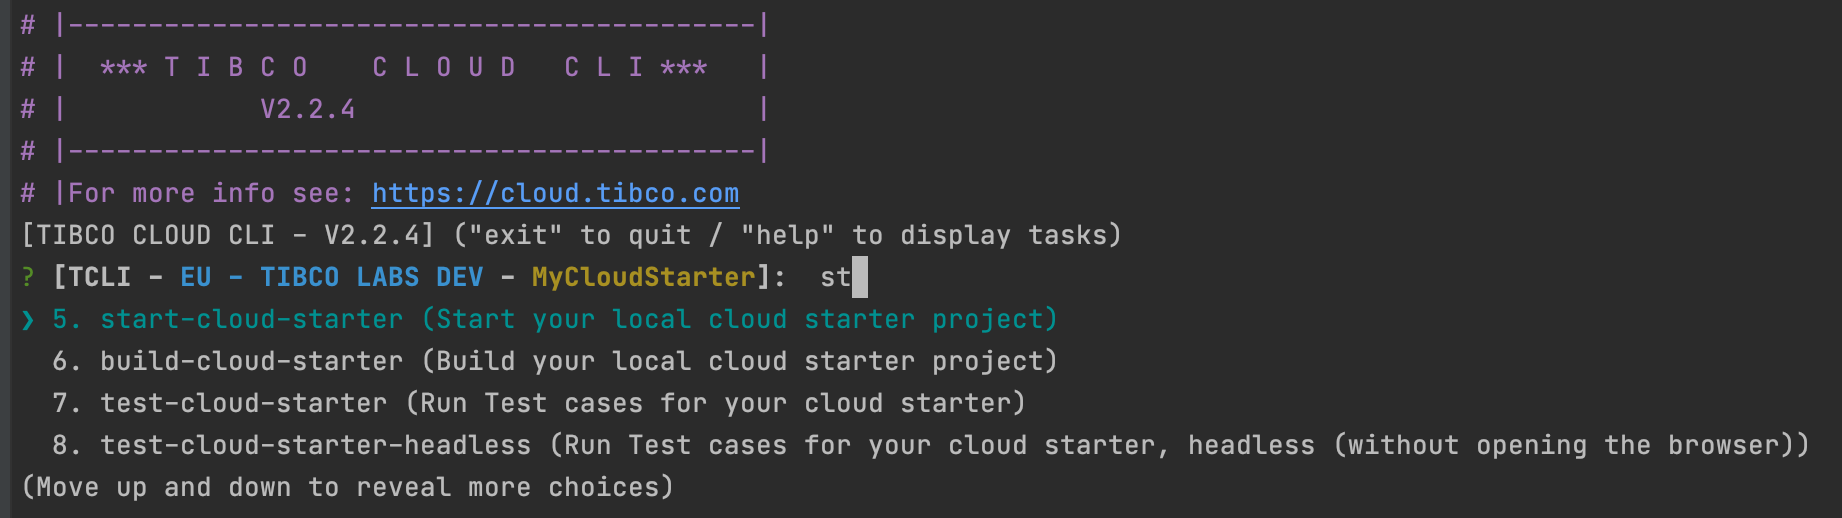
Start the Cloud Application locally
Now we have created our cloud application we can select start-cloud-app from the menu:
Or use we cloud provide this command on the commandline:
tcli start-cloud-app
or
tcli start
or simply:
tcli s
The Cloud application by default will run on https://localhost:4200/ if the 4200 port is not available tcli will select port 4201, 4202 and so on. This is nice if you want to run a few cloud applications or a few versions of a cloud application next to each other.
Note: When you have an OAUTH token configured in your tibco cloud property file (or globally) the startup script will inject this token in your proxy that routes all your local calls to the TIBCO Cloud. In this way you don't have to login in your local development setup. Also; when you startup the tcli will check the validity of your OAUTH Token, and if it is about to expire it will rotate it for you automatically. You can run this action yourself as well:
tcli validate-and-rotate-oauth-token
or simply:
tcli vo
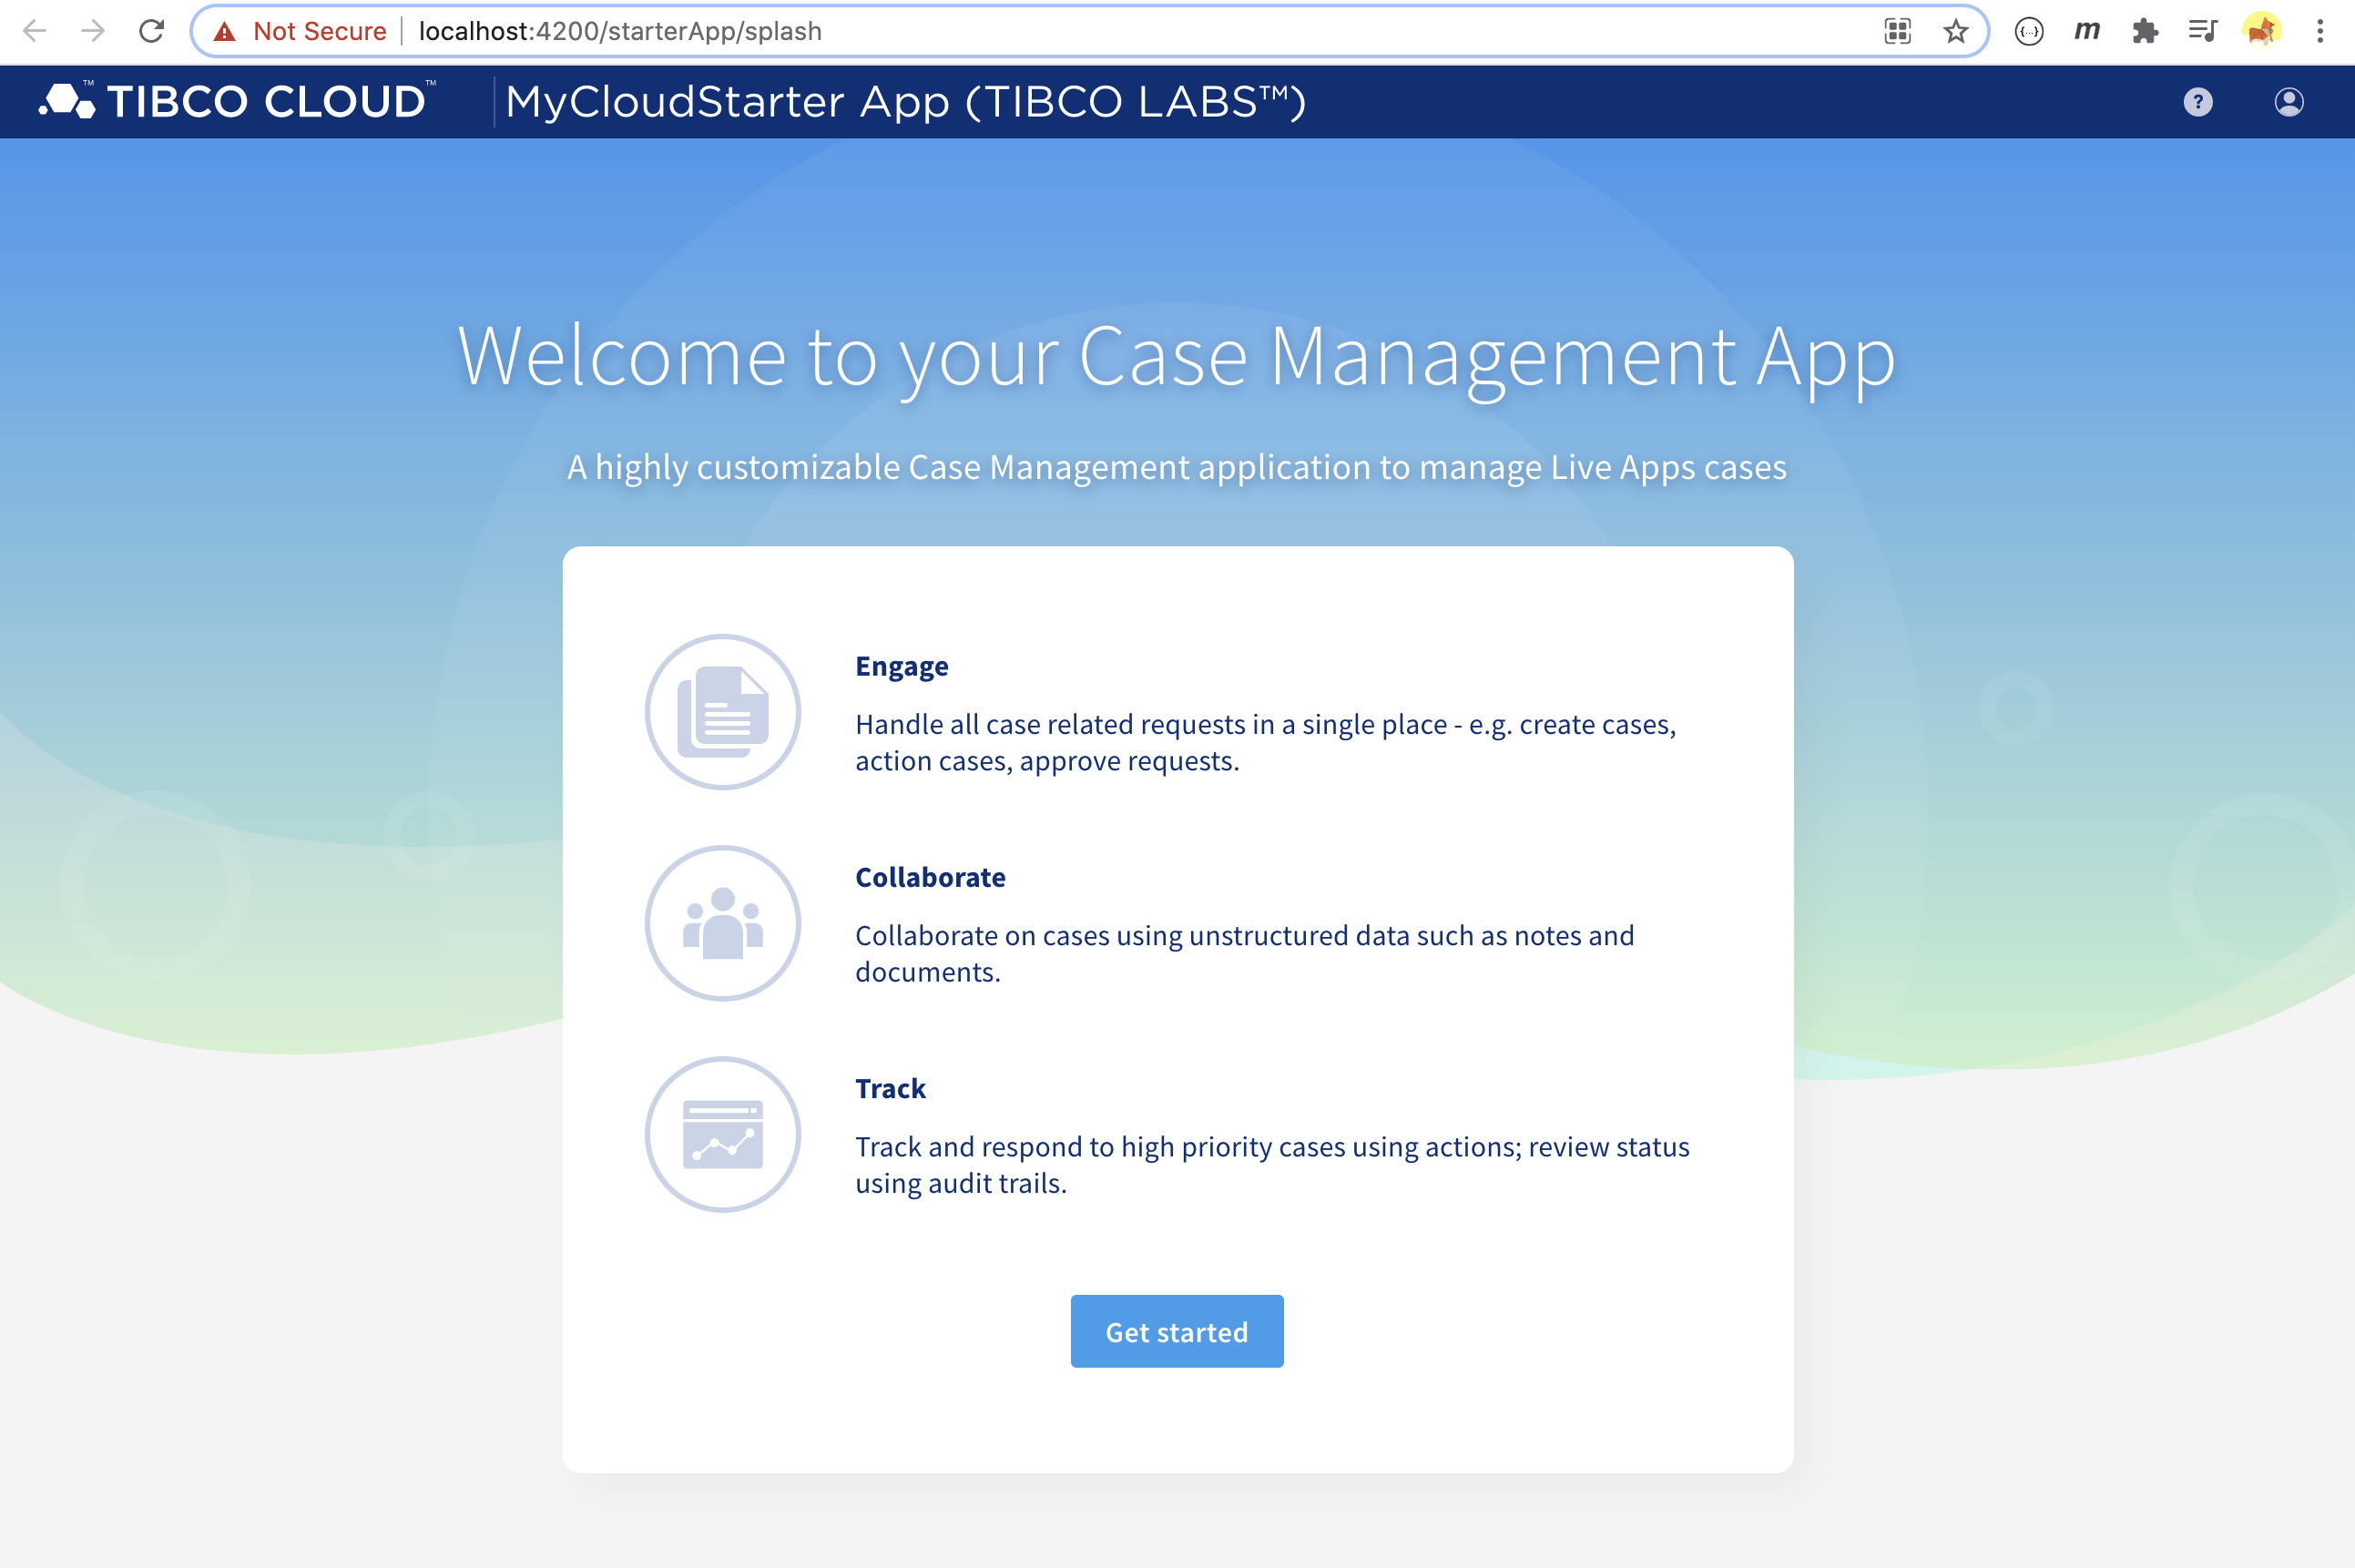
We can now open the Cloud Application locally in the browser:
Make a change to the Cloud Application
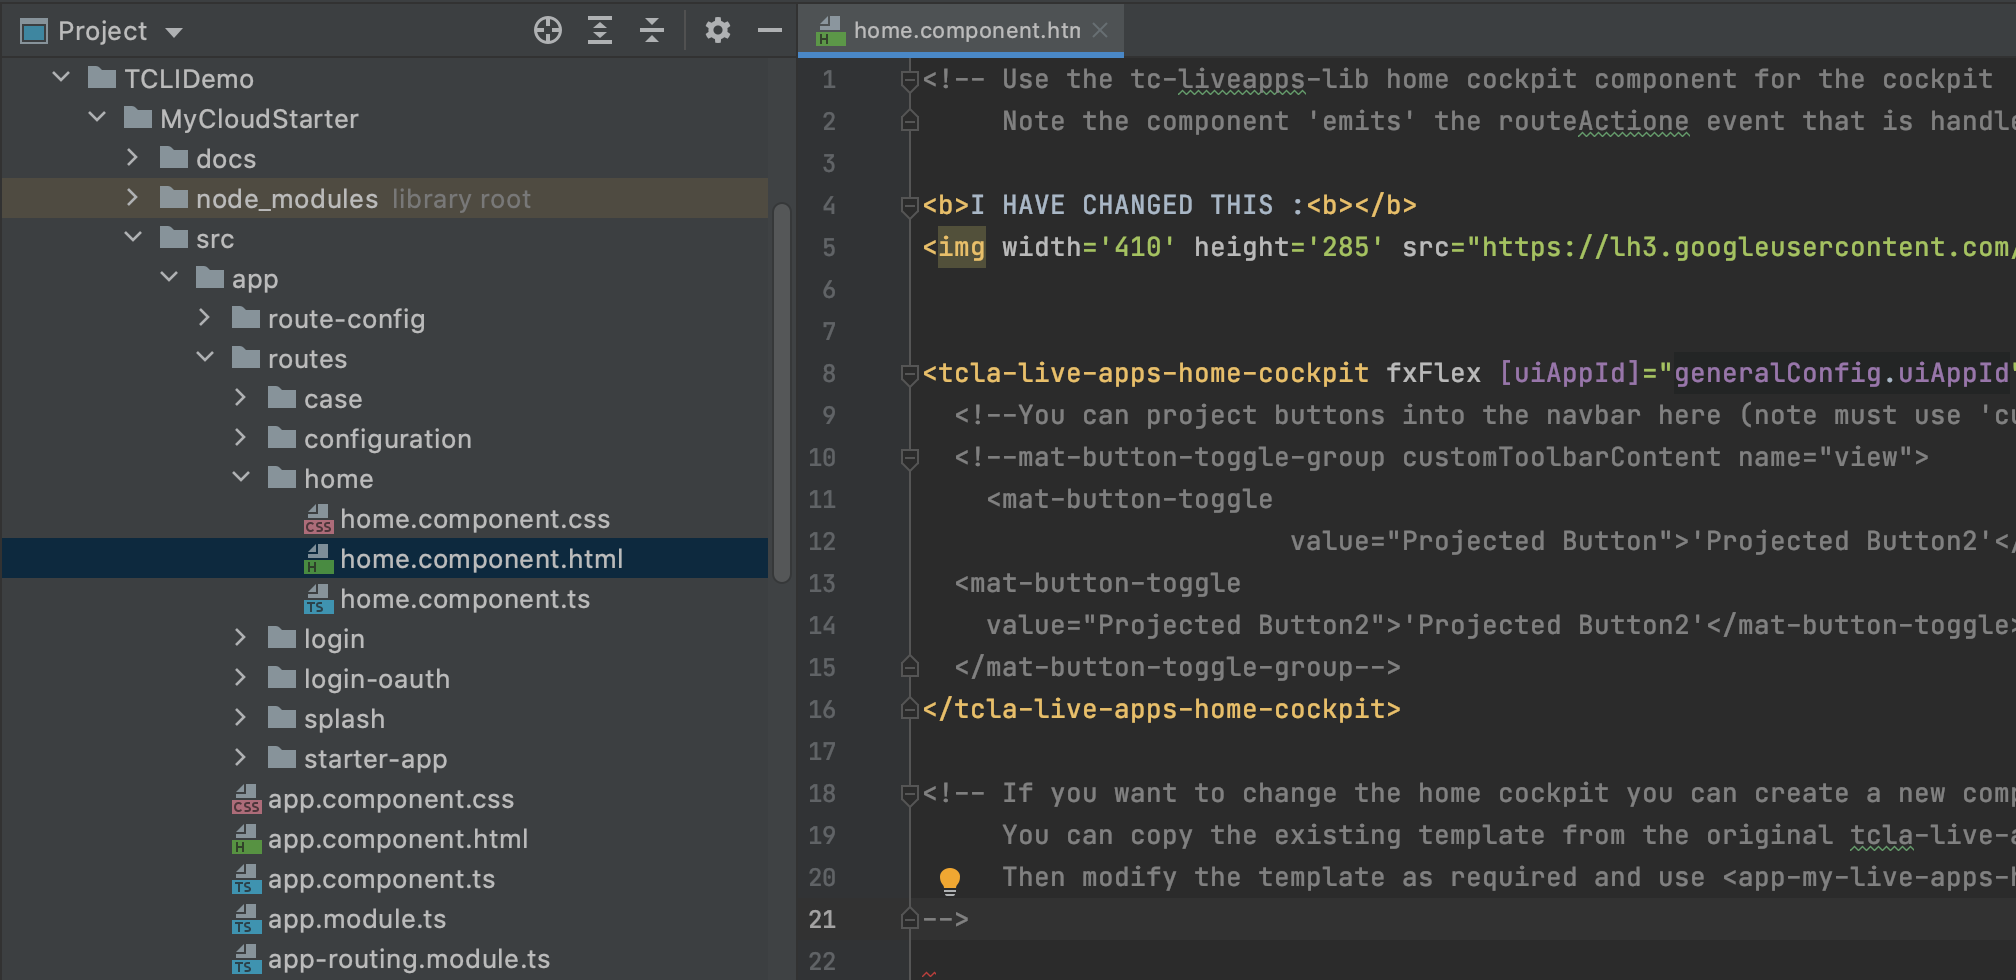
Now you can basically start your development cycle and based on your requirements and template that use use make changes to the Cloud Application. The nice thing about the Cloud Application apps is that you can make changes on the fly. For example we are running a Cloud Application like this:

When we take the code of the Home component and we add some HTML code in:
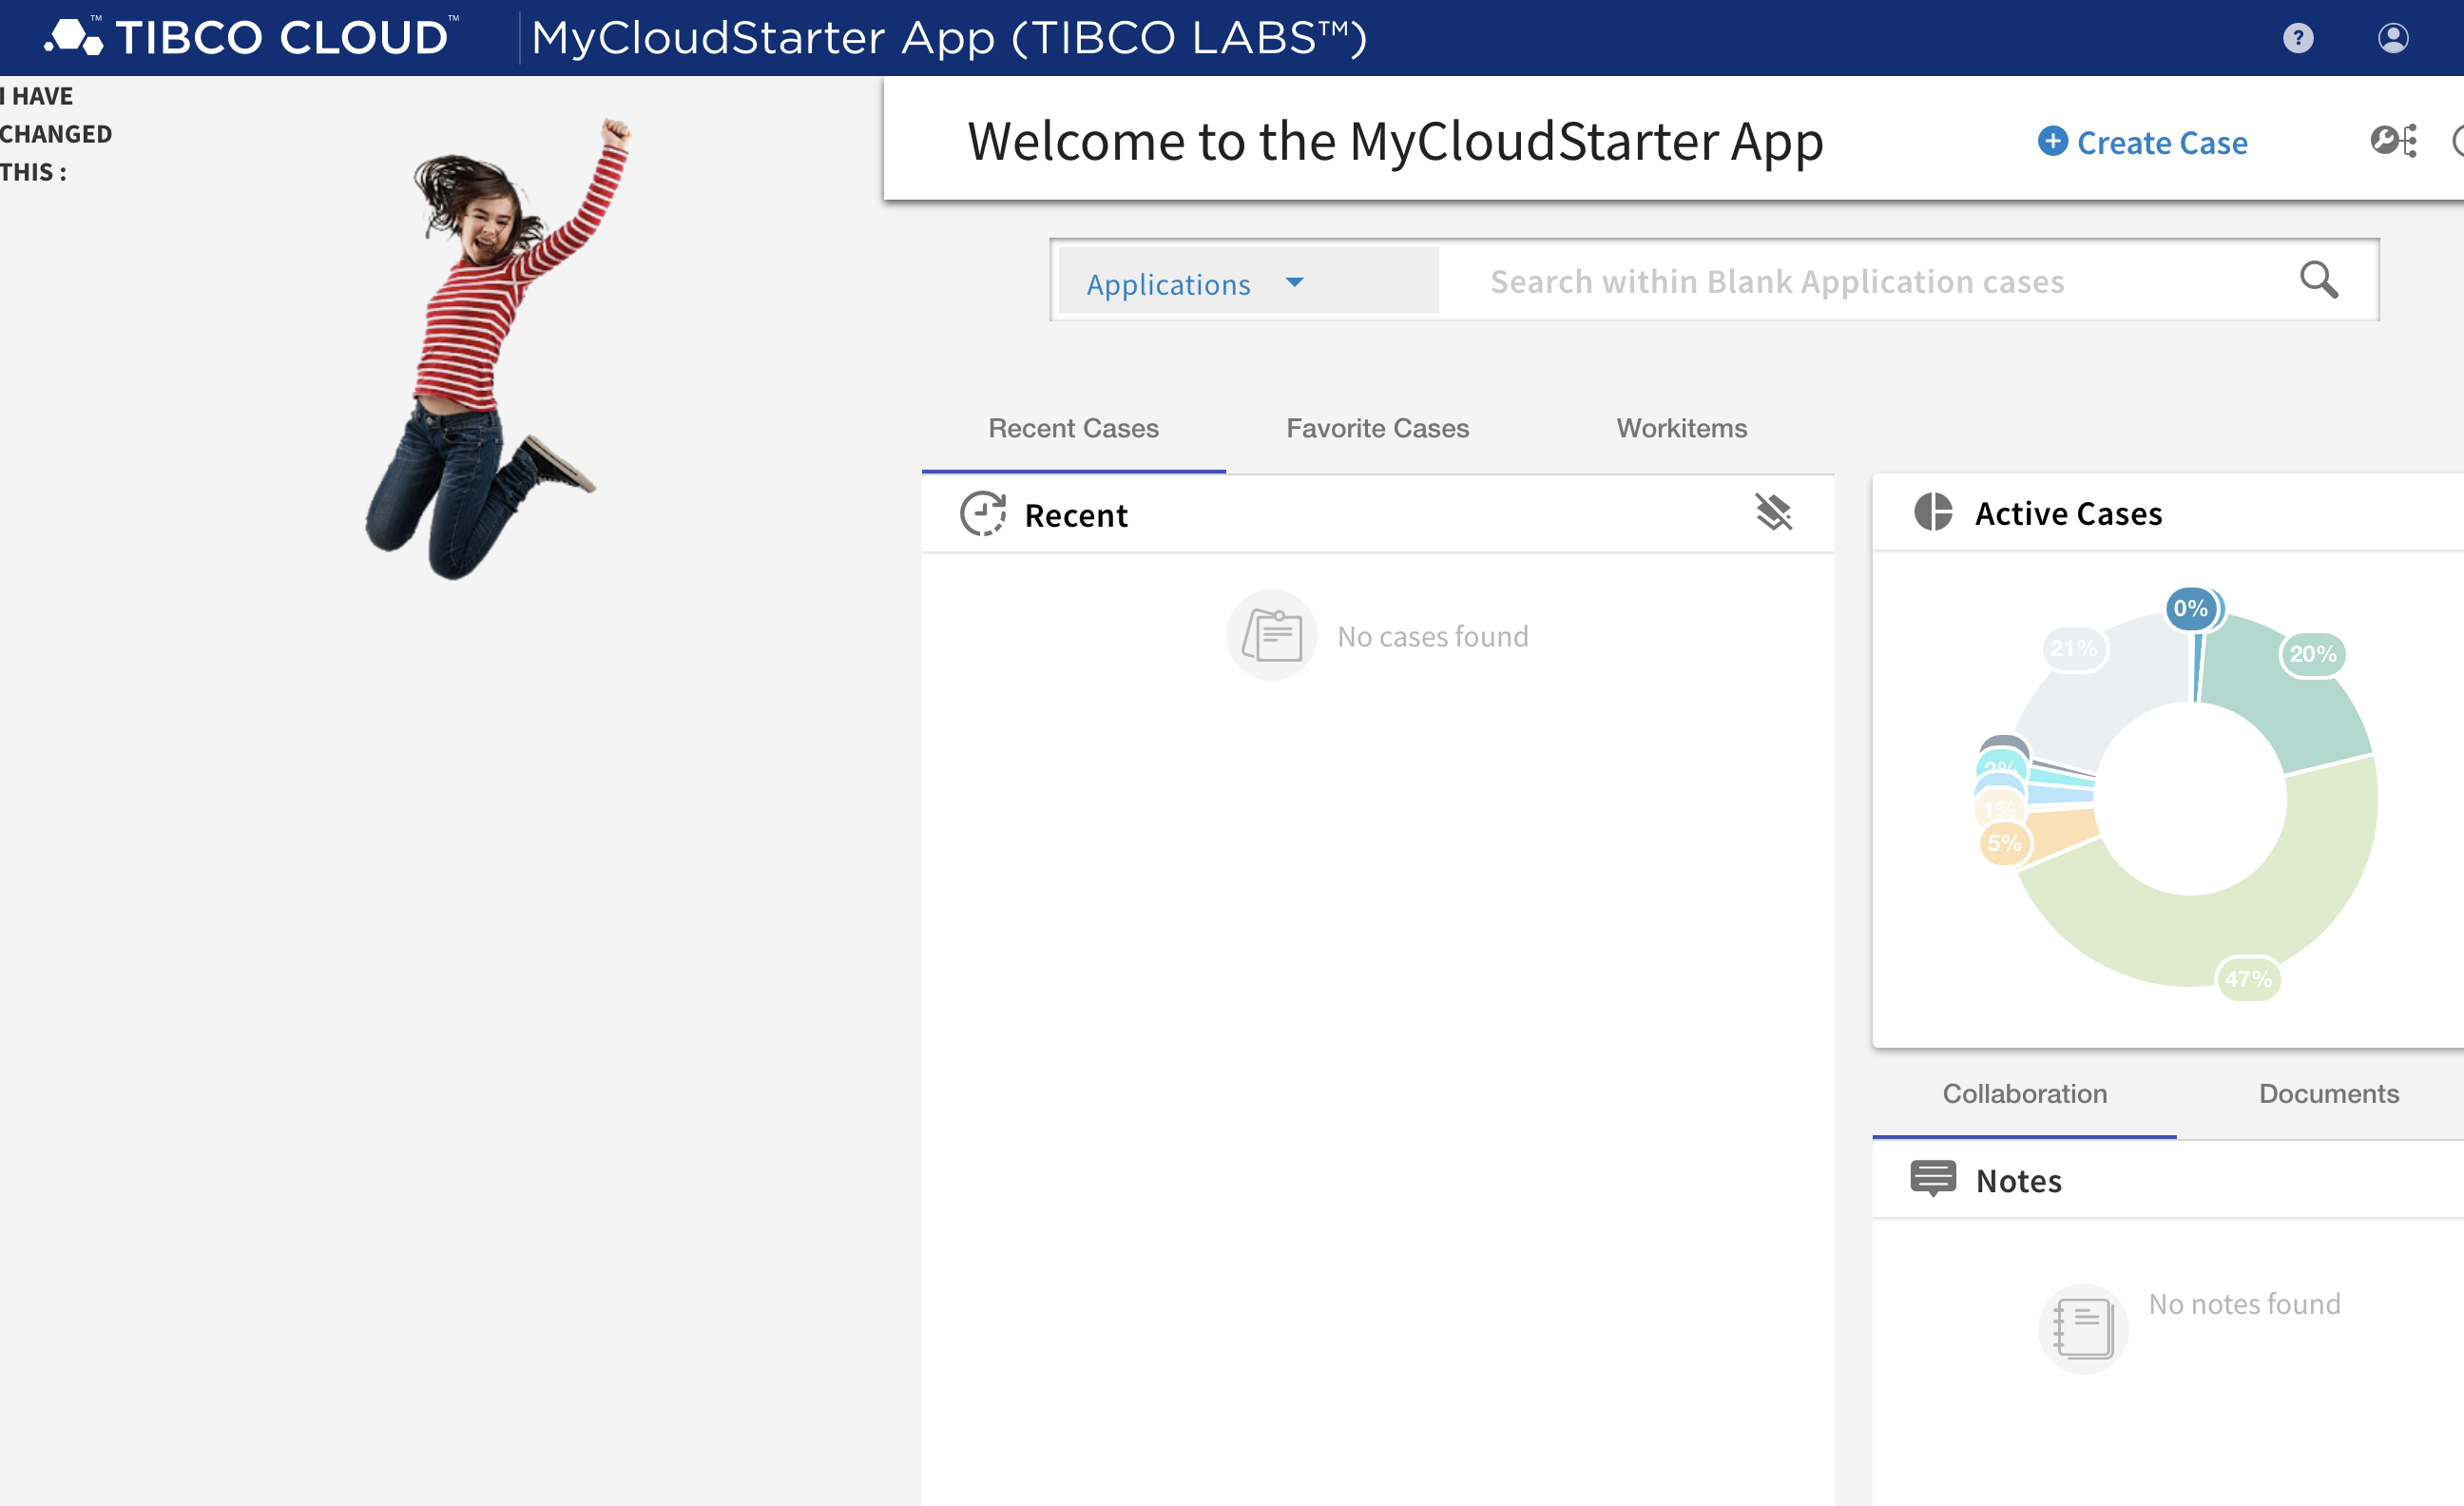
We can see the result directly on the Screen:
Apply a Schematic
Instead of doing all the changes manually we can also use a concept called Angular Schematics. Besides the basic angular schematics to create components and services for example, we also have created some schematics in the Cloud Composer Toolkit:
Note: Stop your Cloud Application when applying schematics
The tcli provides a command to add these schematics in:
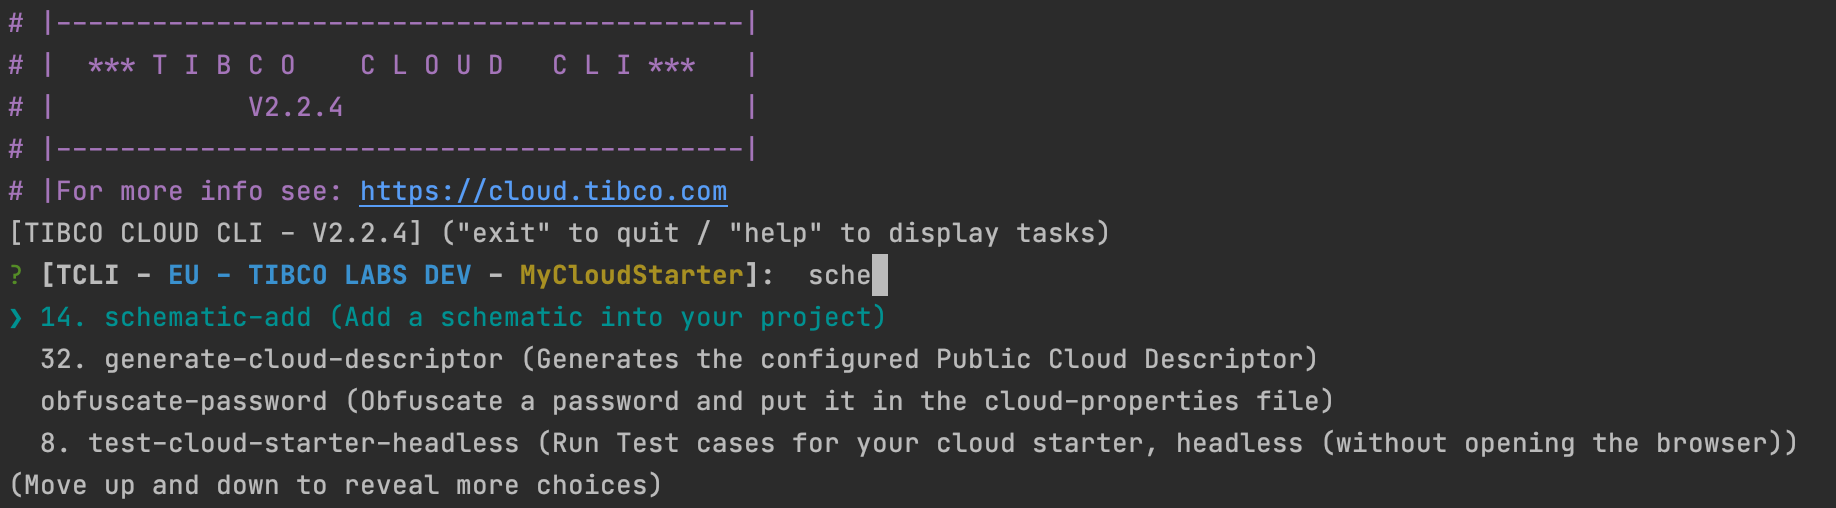
Or you could run:
tcli schematic-add
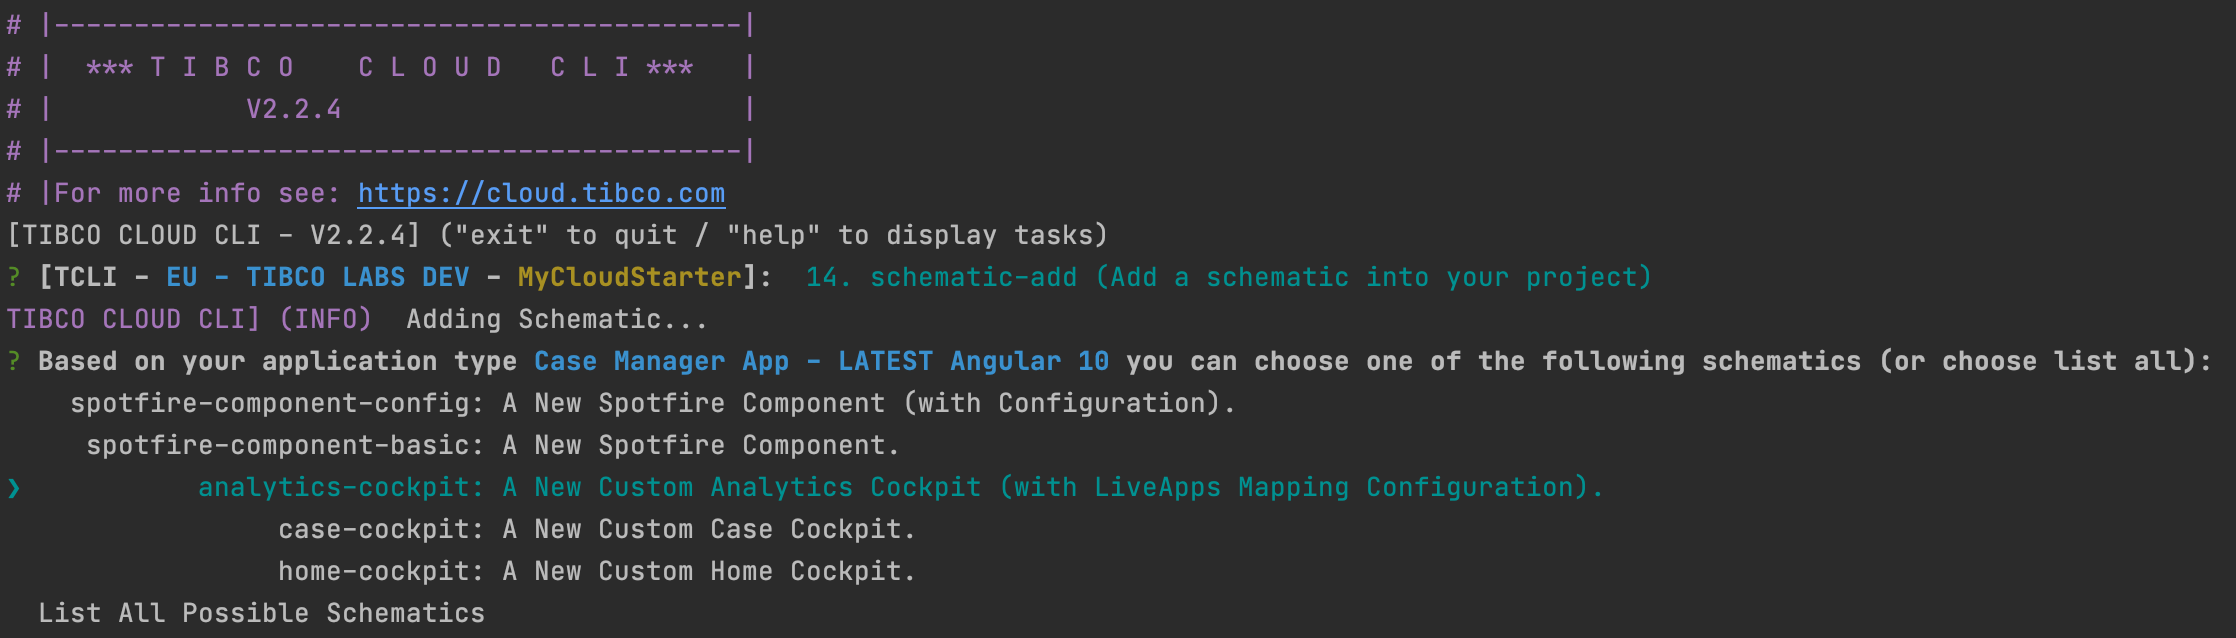
Based on the template that you are using you get the available schematics shown:
Every schematic asks a number of questions, and based on the answers it will generate all the required HTML,CSS and TS code:

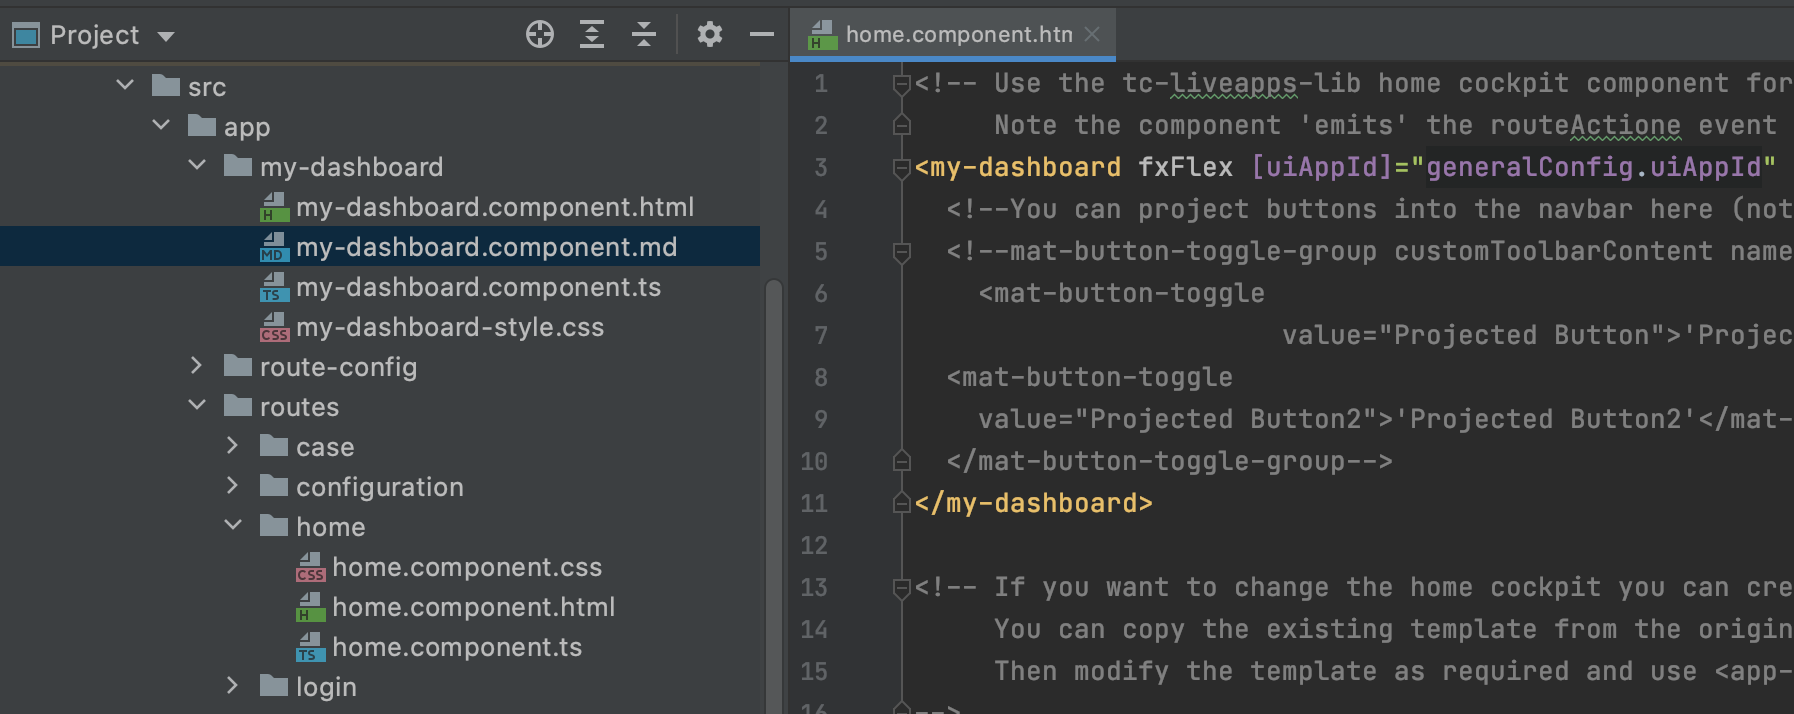
In this case the schematic created a component called MyDashboard, which we can use on our home component:
Now when we start our Cloud Application we can see that we have added a Spotfire Analytical dashboard in our Cloud Application, without hardly writing any code:

Build and Deploy the Cloud Application to the Cloud
When you are happy with the development of the cloud application it is time to deploy the Cloud Application to the TIBCO Cloud. Before we do this we must build the cloud application, we can do this with the command:
Note: The easiest way to deploy your Cloud Application is running the build-deploy command interactively in the tcli. Here are all the possible commands for completeness.
tcli build-cloud-app
or
tcli build
or simply:
tcli b
When the build command is run the following section in the tibco cloud property file is used:
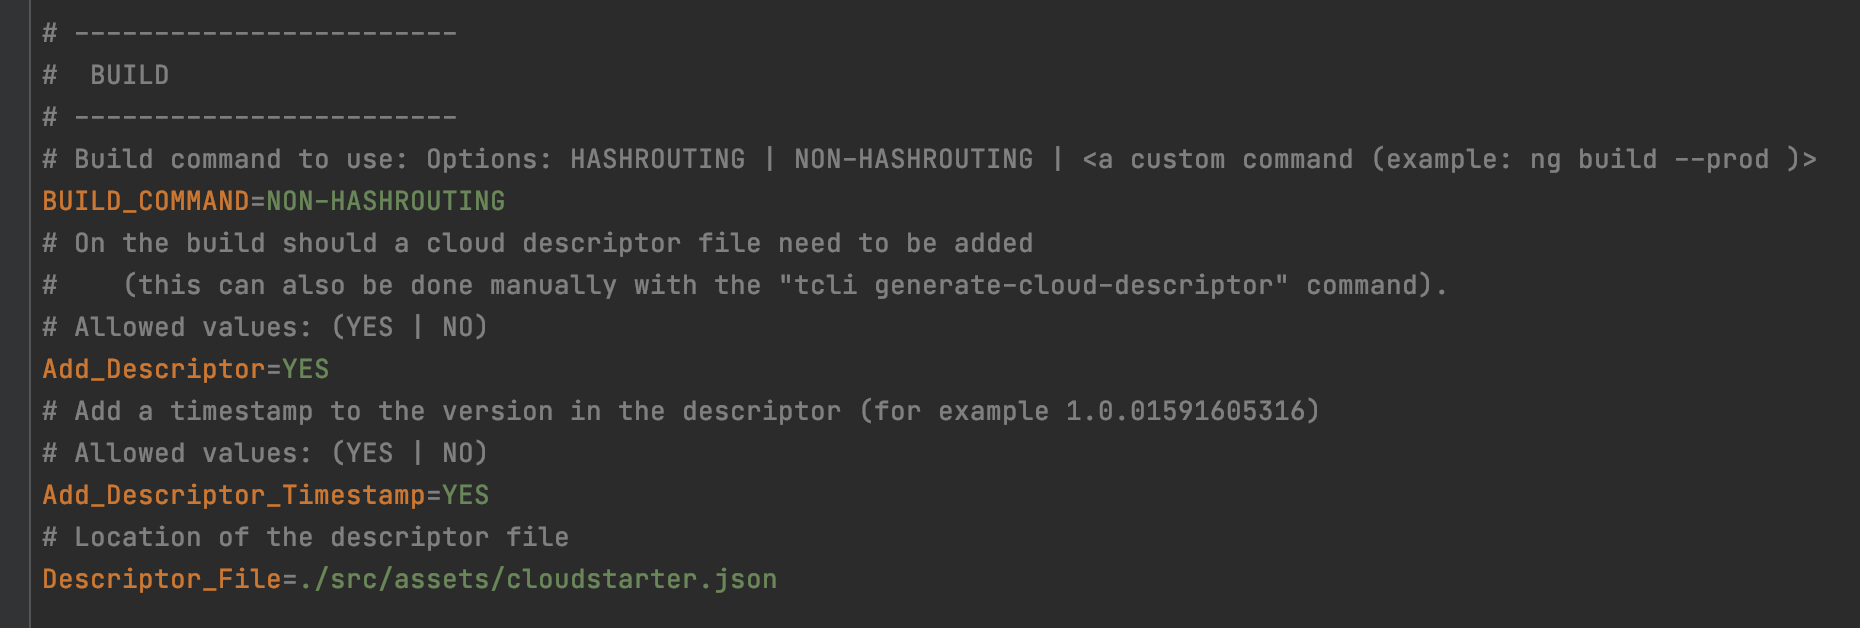
Based on these settings your cloud application gets build. You can leave the default settings, to deploy initially. The builder will include a cloud descriptor file, which can be used on to identify your cloud application later by the show-cloud-app-links command and the App Gallery for example.
The build results in a Zip file that is put into the Dist folder in your project.
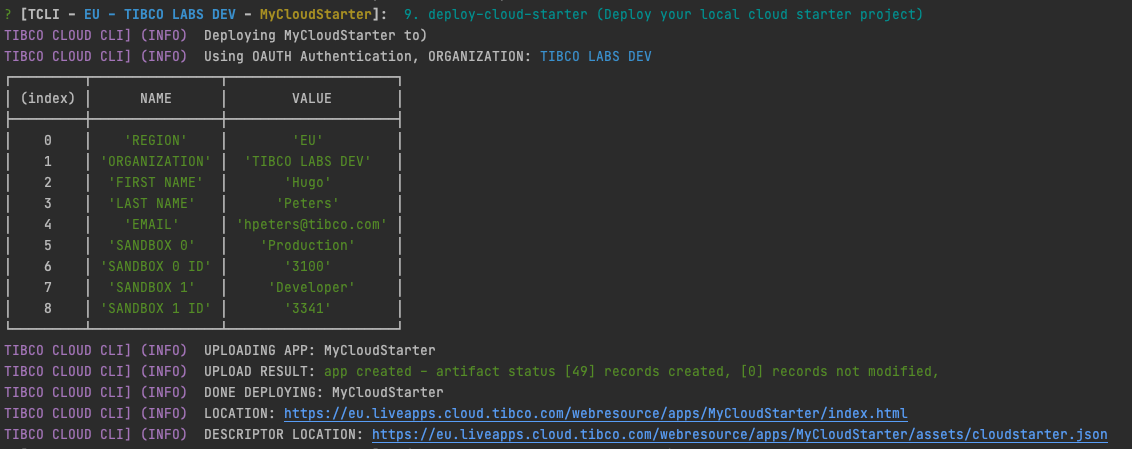
Then we can deploy the cloud application with the following command:
tcli deploy-cloud-app
or
tcli deploy
or simply:
tcli d
After the deployment you get a link to your Cloud Application and your Cloud Descriptor:
You can also run the build and deploy step at once, as follows:
tcli build-deploy-cloud-app
or
tcli build-deploy
or simply:
tcli bd
View Deployed Cloud Applications
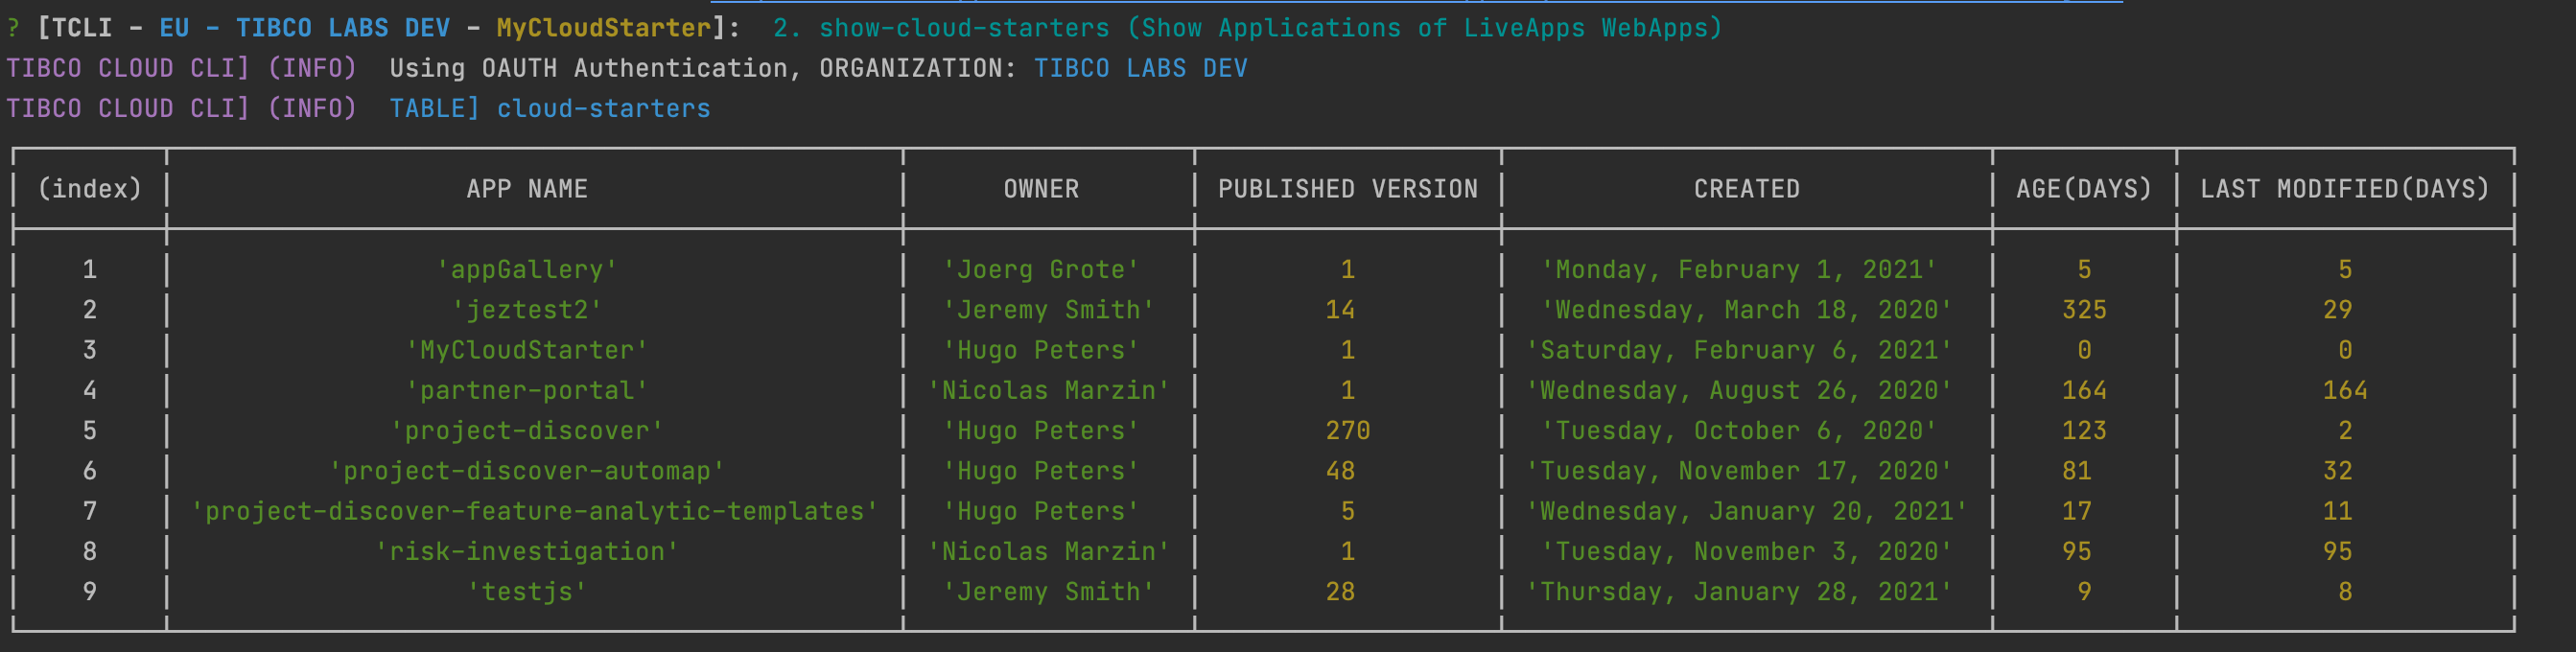
To see which cloud applications are deployed you can run:
tcli show-cloud-apps
or simply:
tcli scs
For example:
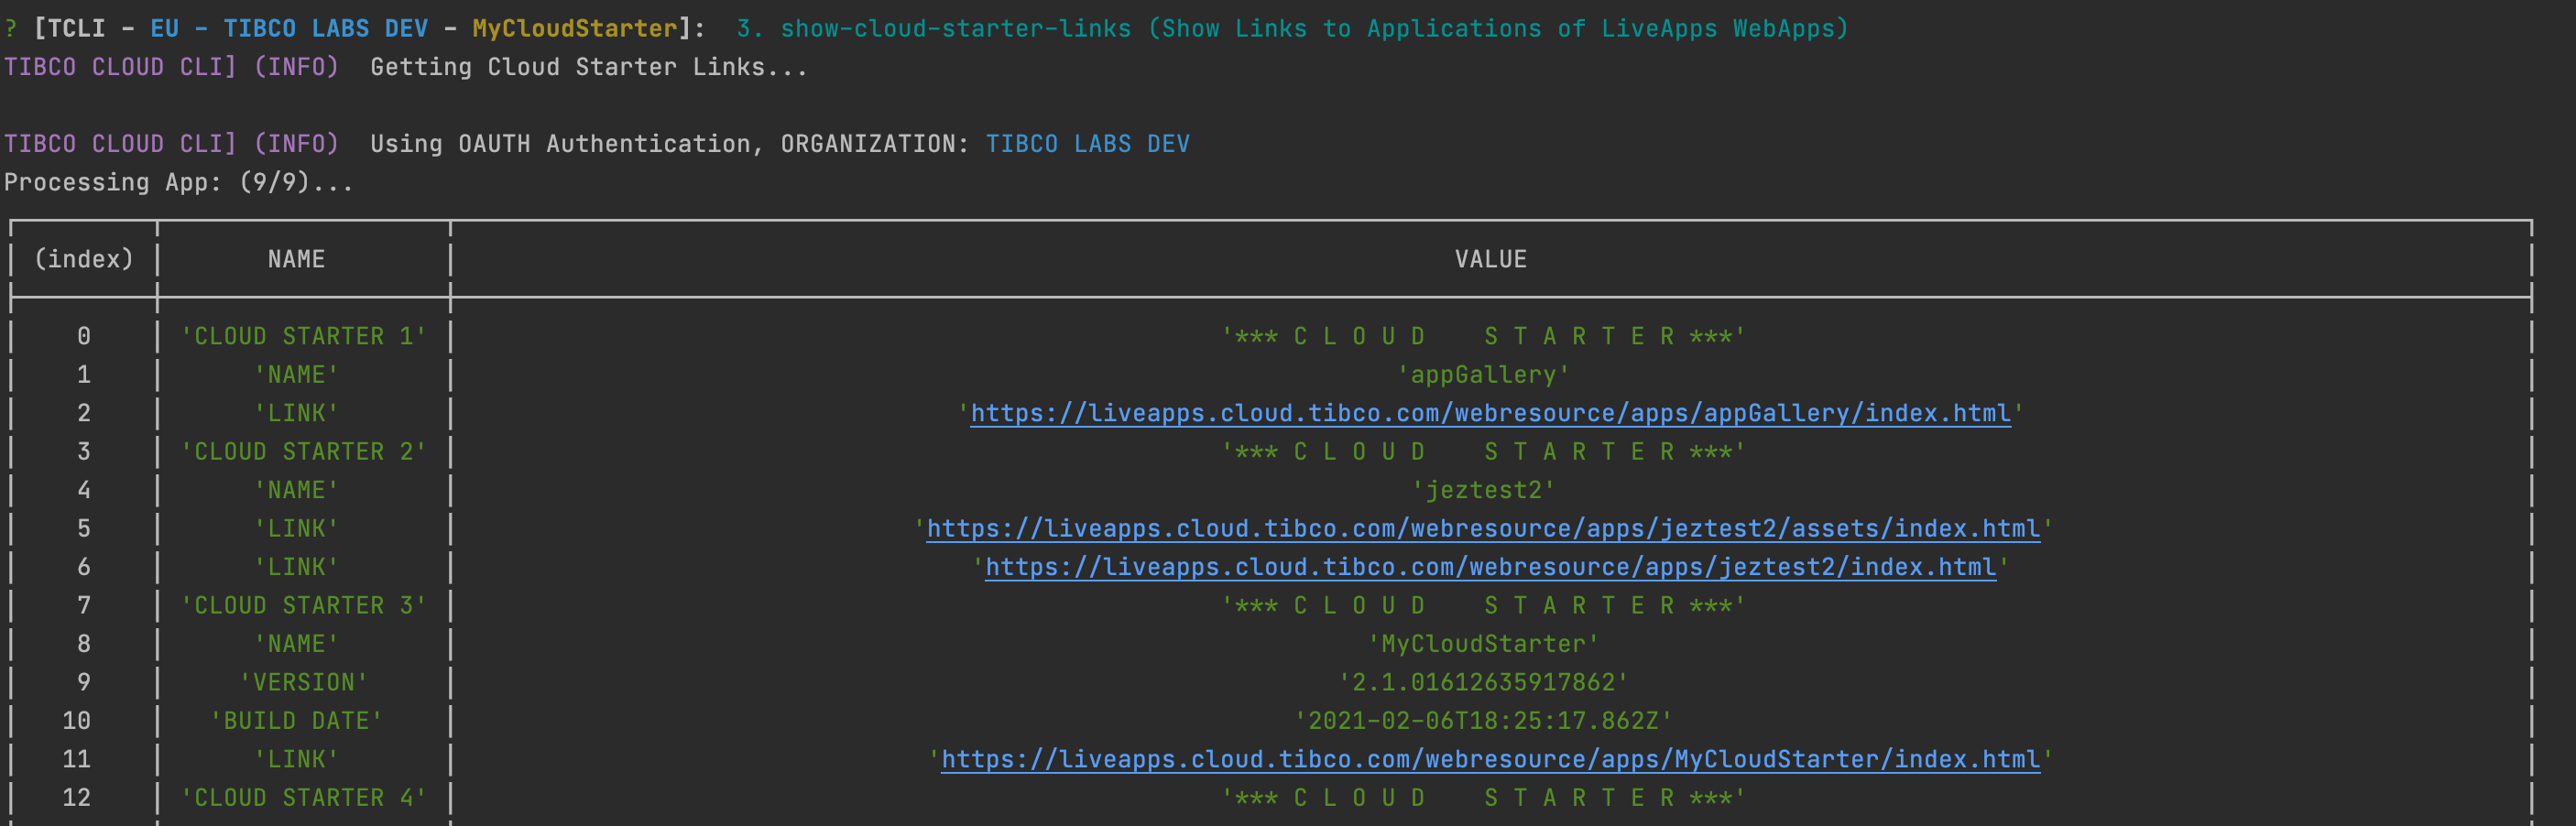
To see which cloud applications are deployed and what there links are you can run
tcli show-cloud-app-links
or simply:
tcli sl
For example:
Build and Deploy Interactively
In your cloud application folder run:
tcli
And choose build-deploy, which will deploy your cloud applications.

Note: Remember you can always press up or run the repeat-last-task option to redeploy quickly.
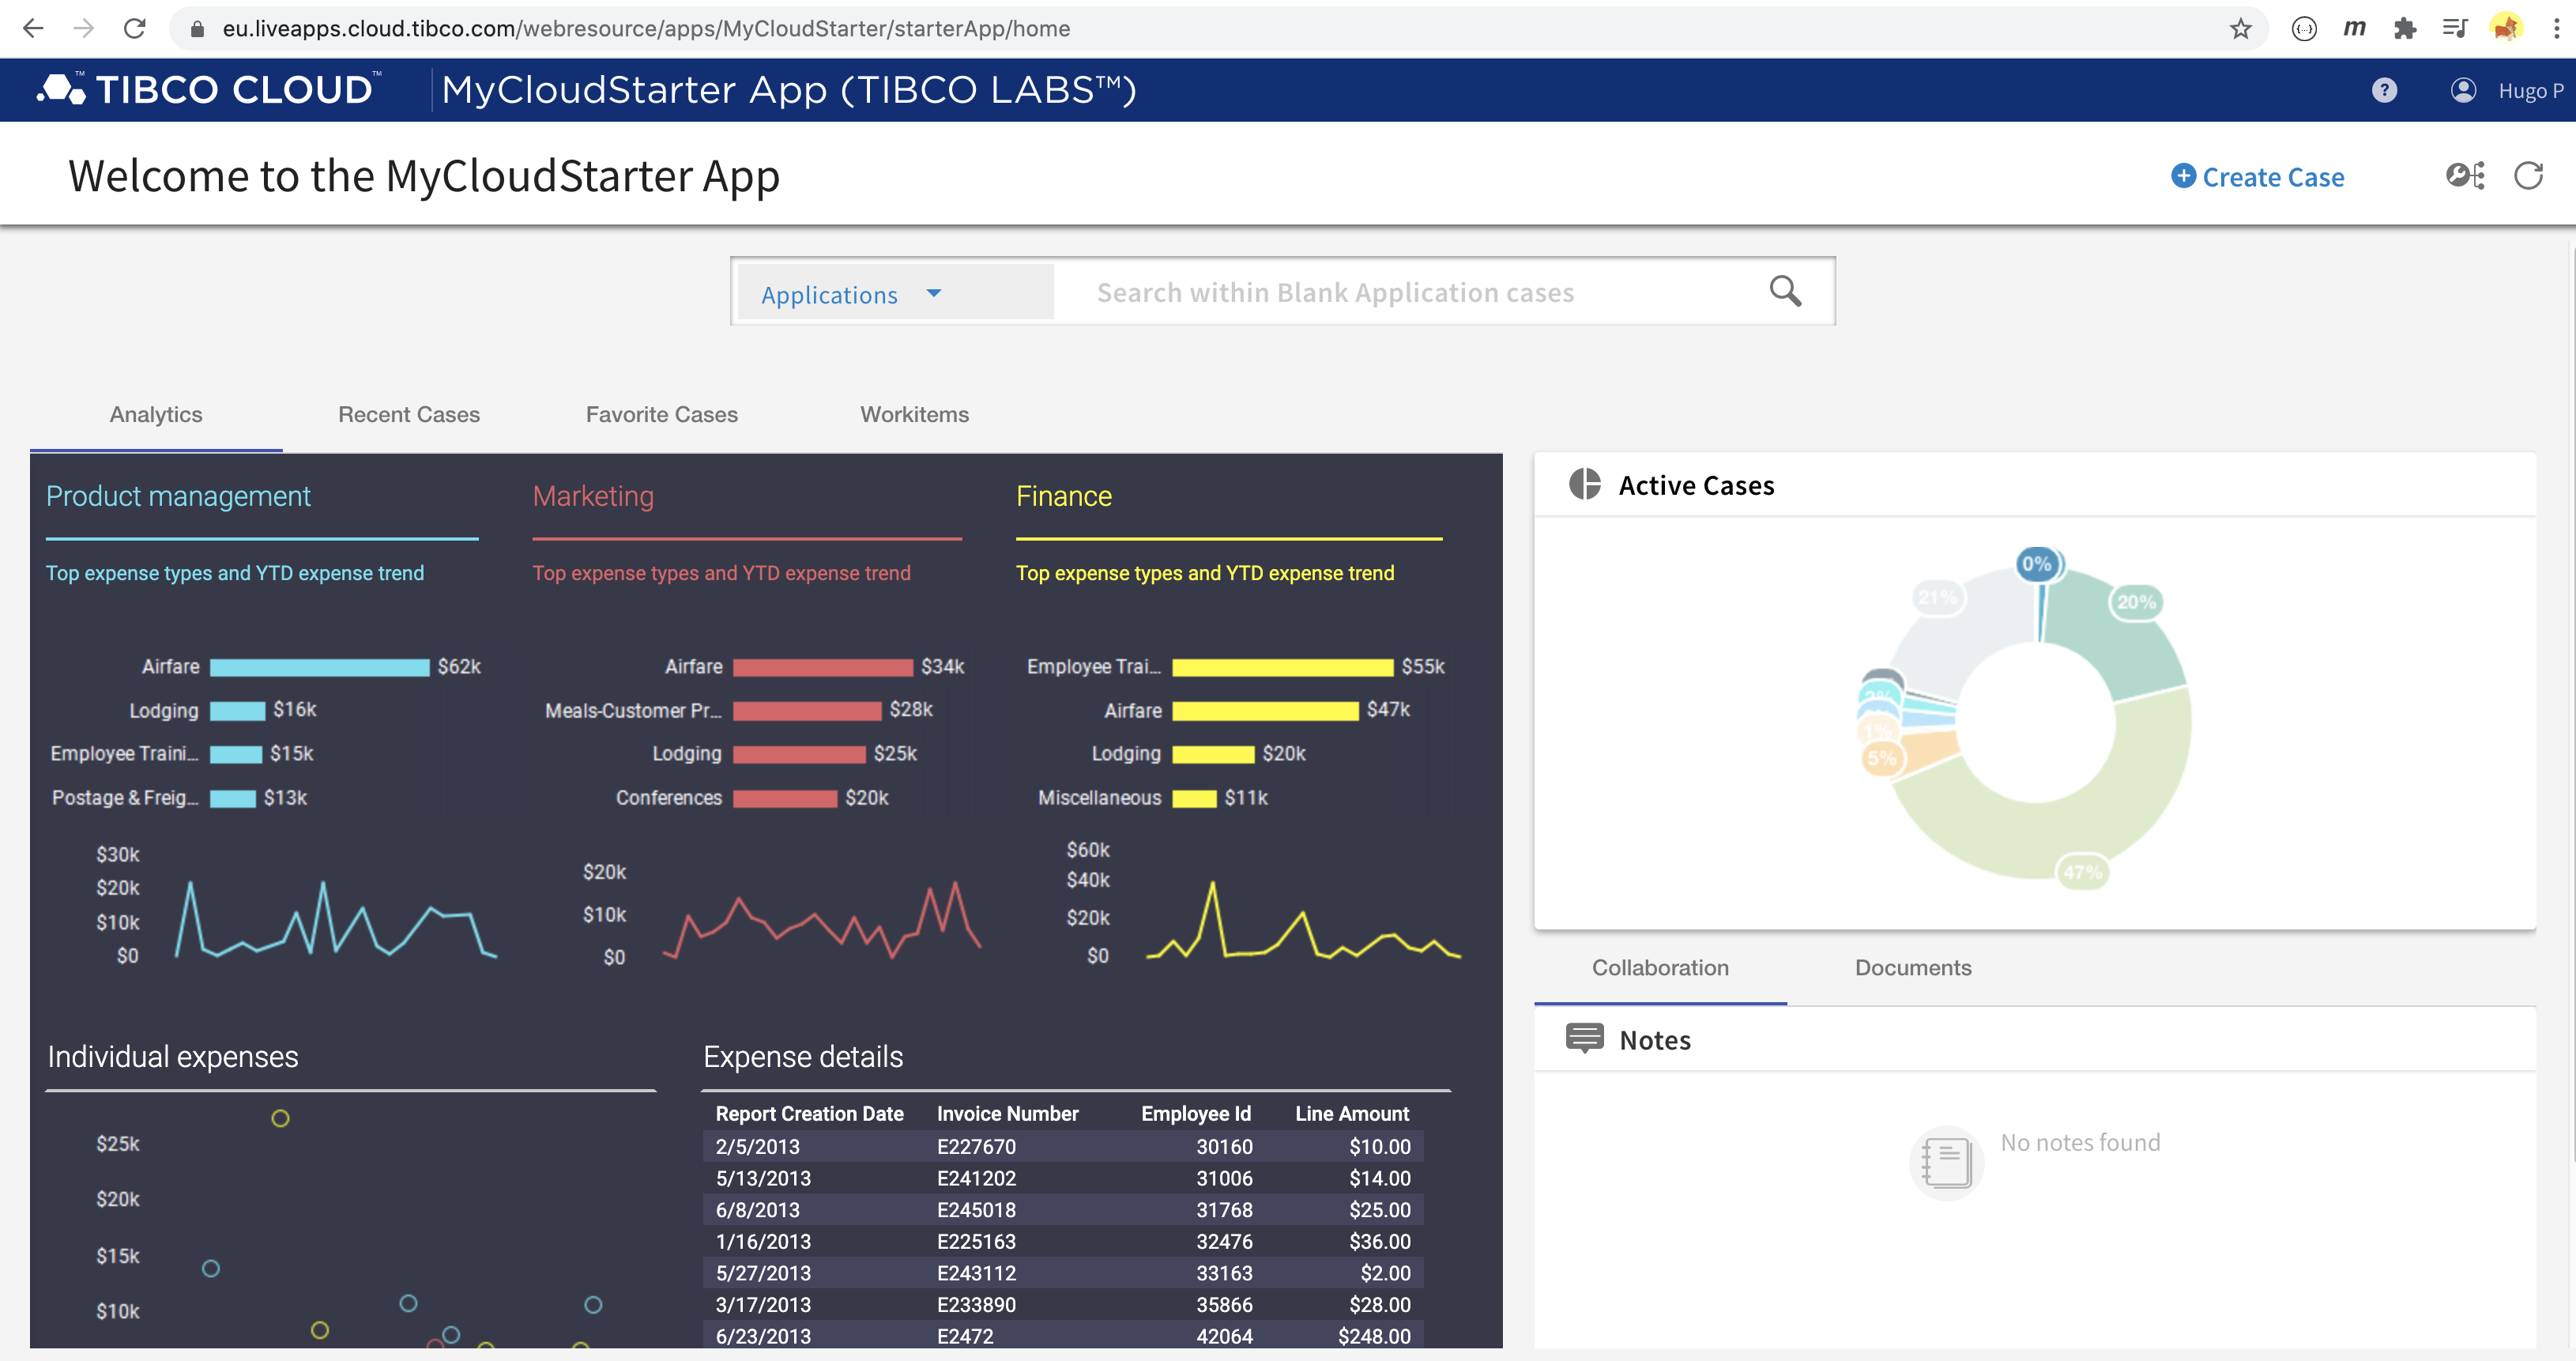
Now we have our Cloud Application running on the TIBCO Cloud:
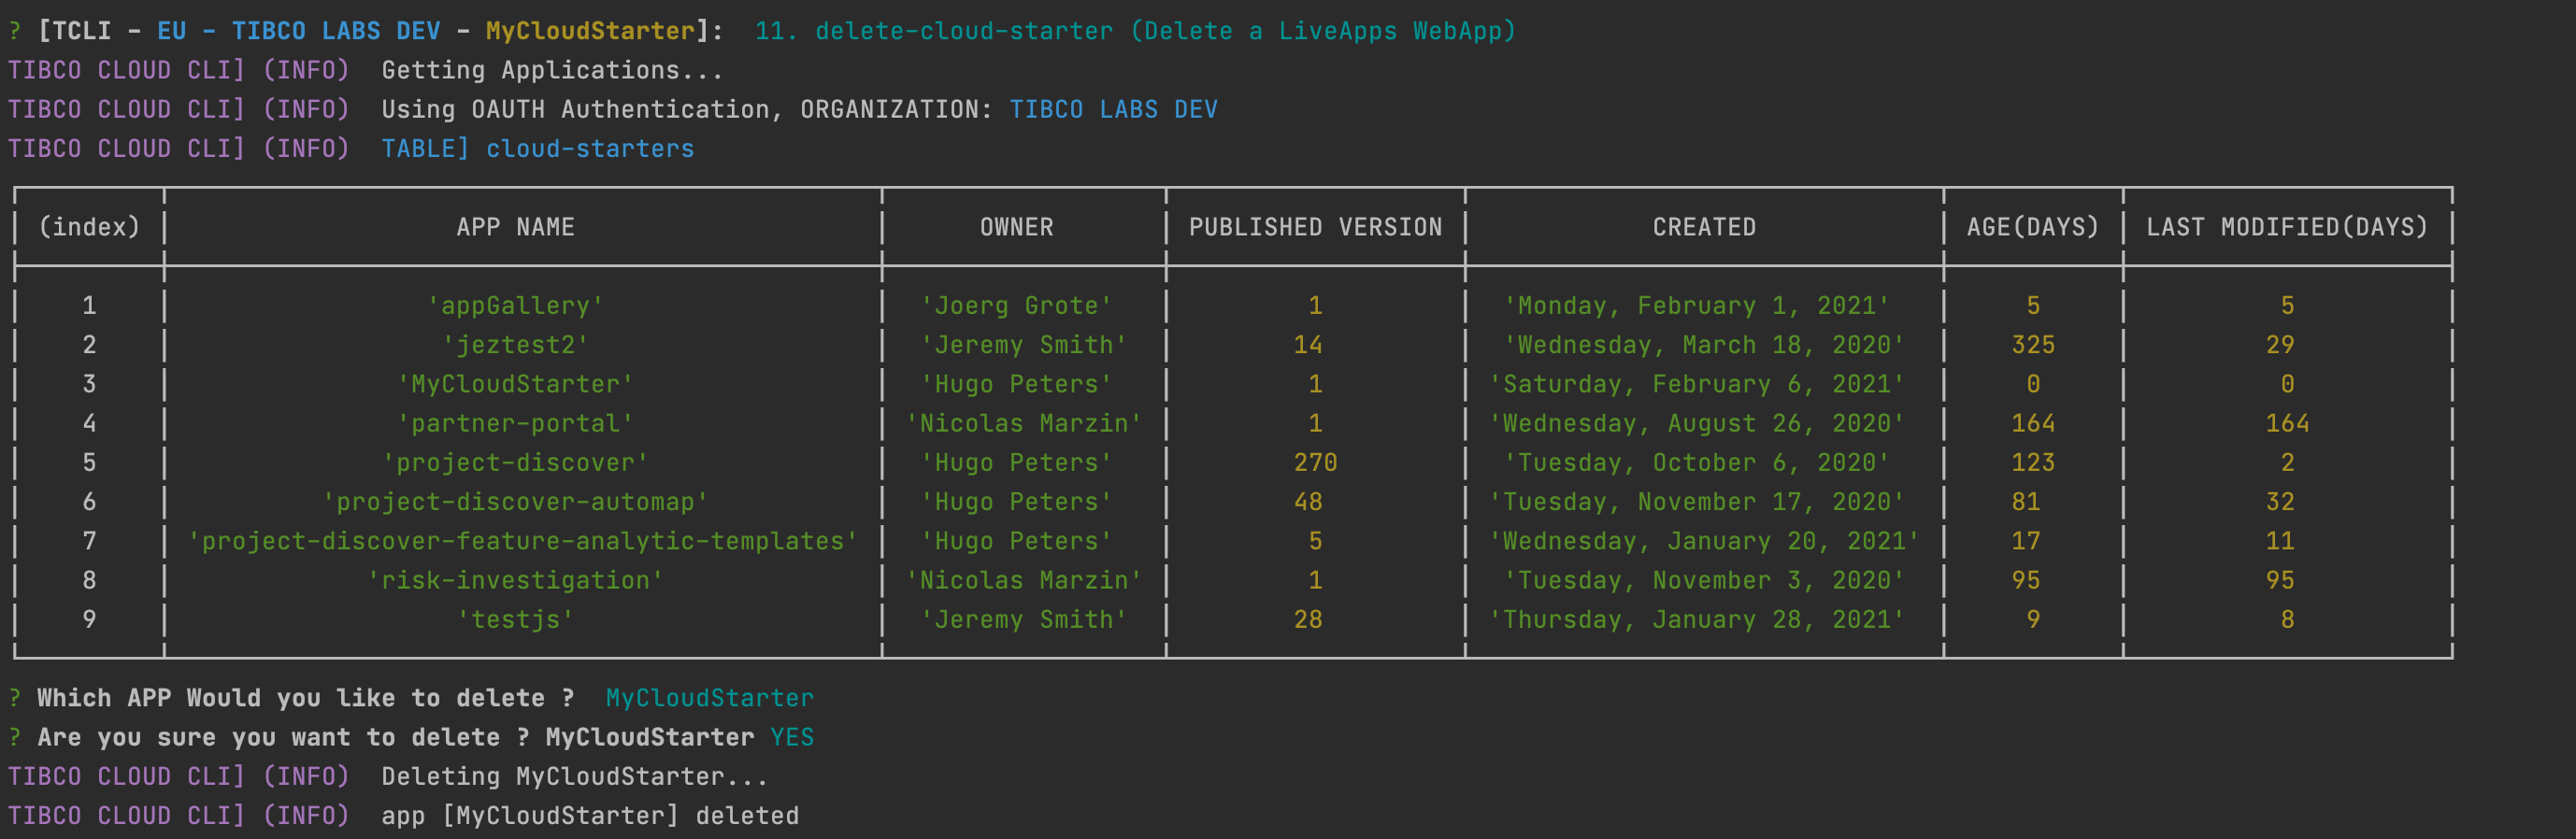
Delete a Cloud Application
You can delete a cloud application with the following command:
tcli delete-cloud-app
This command will first list all the Cloud Applications and then ask which one you want to delete and aks if you are sure and then delete the app:
To manage multiple Cloud Applications simultaneously go to the section Managing multiple TIBCO Cloud organizations