Advanced Developer
Advanced Developer Use Cases
Note: Before you continue understand that these procedures adjust your package.json, angular.json and your tsconfig.json files. Backups are made, but make sure that you have an understanding of the content of these files and the impact on your application.
TIBCO Cloud CLI
Before you use the Cloud CLI you must set the connection to the TIBCO Cloud, you can do this in the tibco-cloud.properties file. In here fill in the following details:
CloudLogin.tenantID=bpm
CloudLogin.clientID=<Client ID>
CloudLogin.email=<Your Email>
CloudLogin.pass=<Your (obfuscated password) Password>
You can get the Client ID with the procedure described in the getting started guid. You can obfuscate a password by typing:
Gulp obfuscate
Note: An obfuscated password can still be retrieved, be carefull sharing this or checking this into source control.
You can start the Cloud CLI by typing
Gulp
This brings you in the following menu:
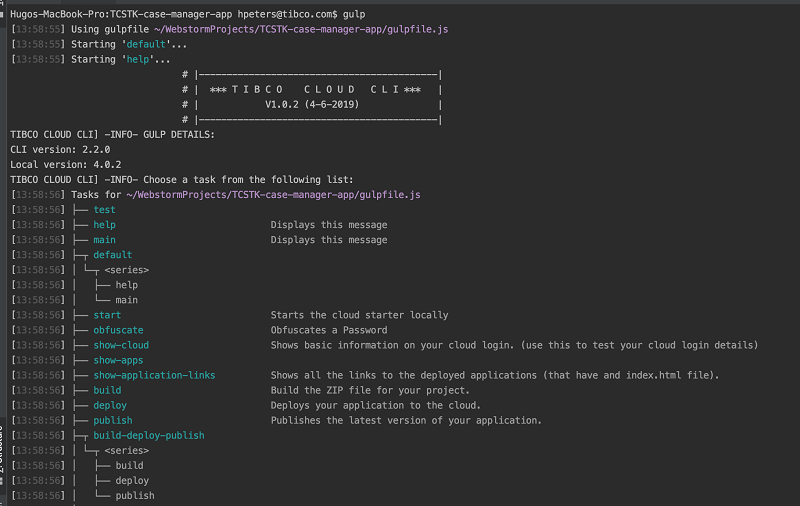
From here you can do a number of tasks:
- Debug Application
- Build Application
- Deploy Application
- Publish Application
- Test Cloud Login
- List Cloud Applications
- Show Cloud Links
- Obfuscate a password
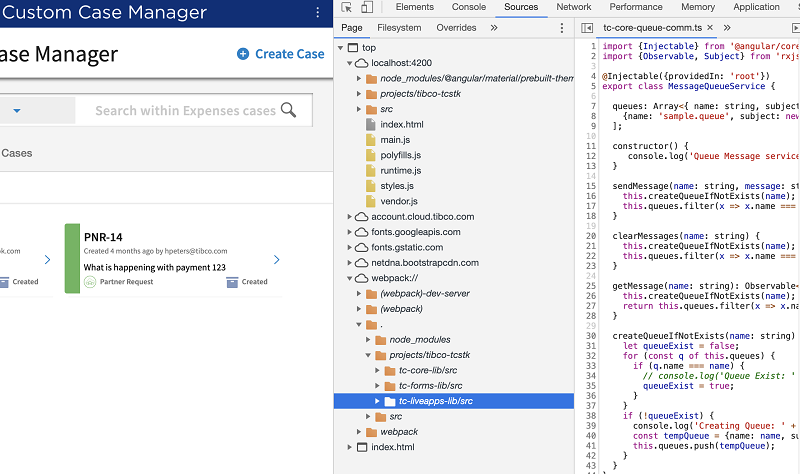
Debug Application
To debug the TIBCO Cloud Libraries used in your application like: * tc-core-lib * tc-forms-lib * tc-liveapps-lib
Make sure your application is stopped and your package.json, angular.json and tsconfig.json files are in synch with their .build versions. Also ensure you that you have back-upped any resources in the projects and tmp folders.
Now run the inject-lib-sources command from the cloud cli.

No you can start your application and in your browsers development console you see the Typescript sources of the original typescript files from the libraries for debugging purposes:
Note: Code changes to the libraries won't affect the actual library NPM packages.
In order to revert the debugging setup, run undo-lib-sources in the cloud CLI.