My First App: Hello World
Like with every programming language, a “Hello World” project gets you started with some basic fundamentals and Project Flogo really isn’t that different. This lab will get you started with the Flogo Web UI and building a simple flow.
What you’ll need
The Flogo Web UI
This demo makes use of the Flogo Web UI. To make it easy to get started the Flogo Web UI is packaged up as a docker image which you can get from [docker hub](docker hub. To install Docker for your operating system click here for macOS and here for Windows. The Flogo Web UI contains everything you’ll need to build your Flogo apps, without ever writing code.
Step 1: Starting the Flogo Web UI
To get started with the latest version of the Flogo Web UI paste this command in a terminal window:
docker run -it -p 3303:3303 flogo/flogo-docker:latest eula-accept
The parameters after the docker run command are:
- -it: This parameter keeps a pseudo-tty terminal open and keeps the terminal running in interactive mode. The Flogo Web Ui will print logs to this terminal window
- -p 3303:3303: This parameter tells Docker to bind your computer’s port 3303 to the container’s port 3303
- flogo/flogo-docker:latest: This parameter tells the Docker daemon which container you want to run. In this case it will try to get the latest version of
flogo/flogo-docker - eula-accept: This parameter says you’ve accepted the EULA agreement on our website
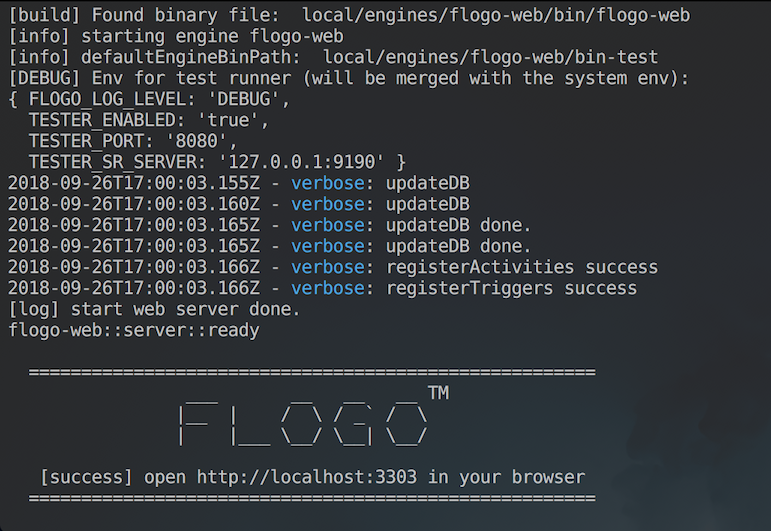
After it is done starting the container, you’ll see something like the image below in your terminal.
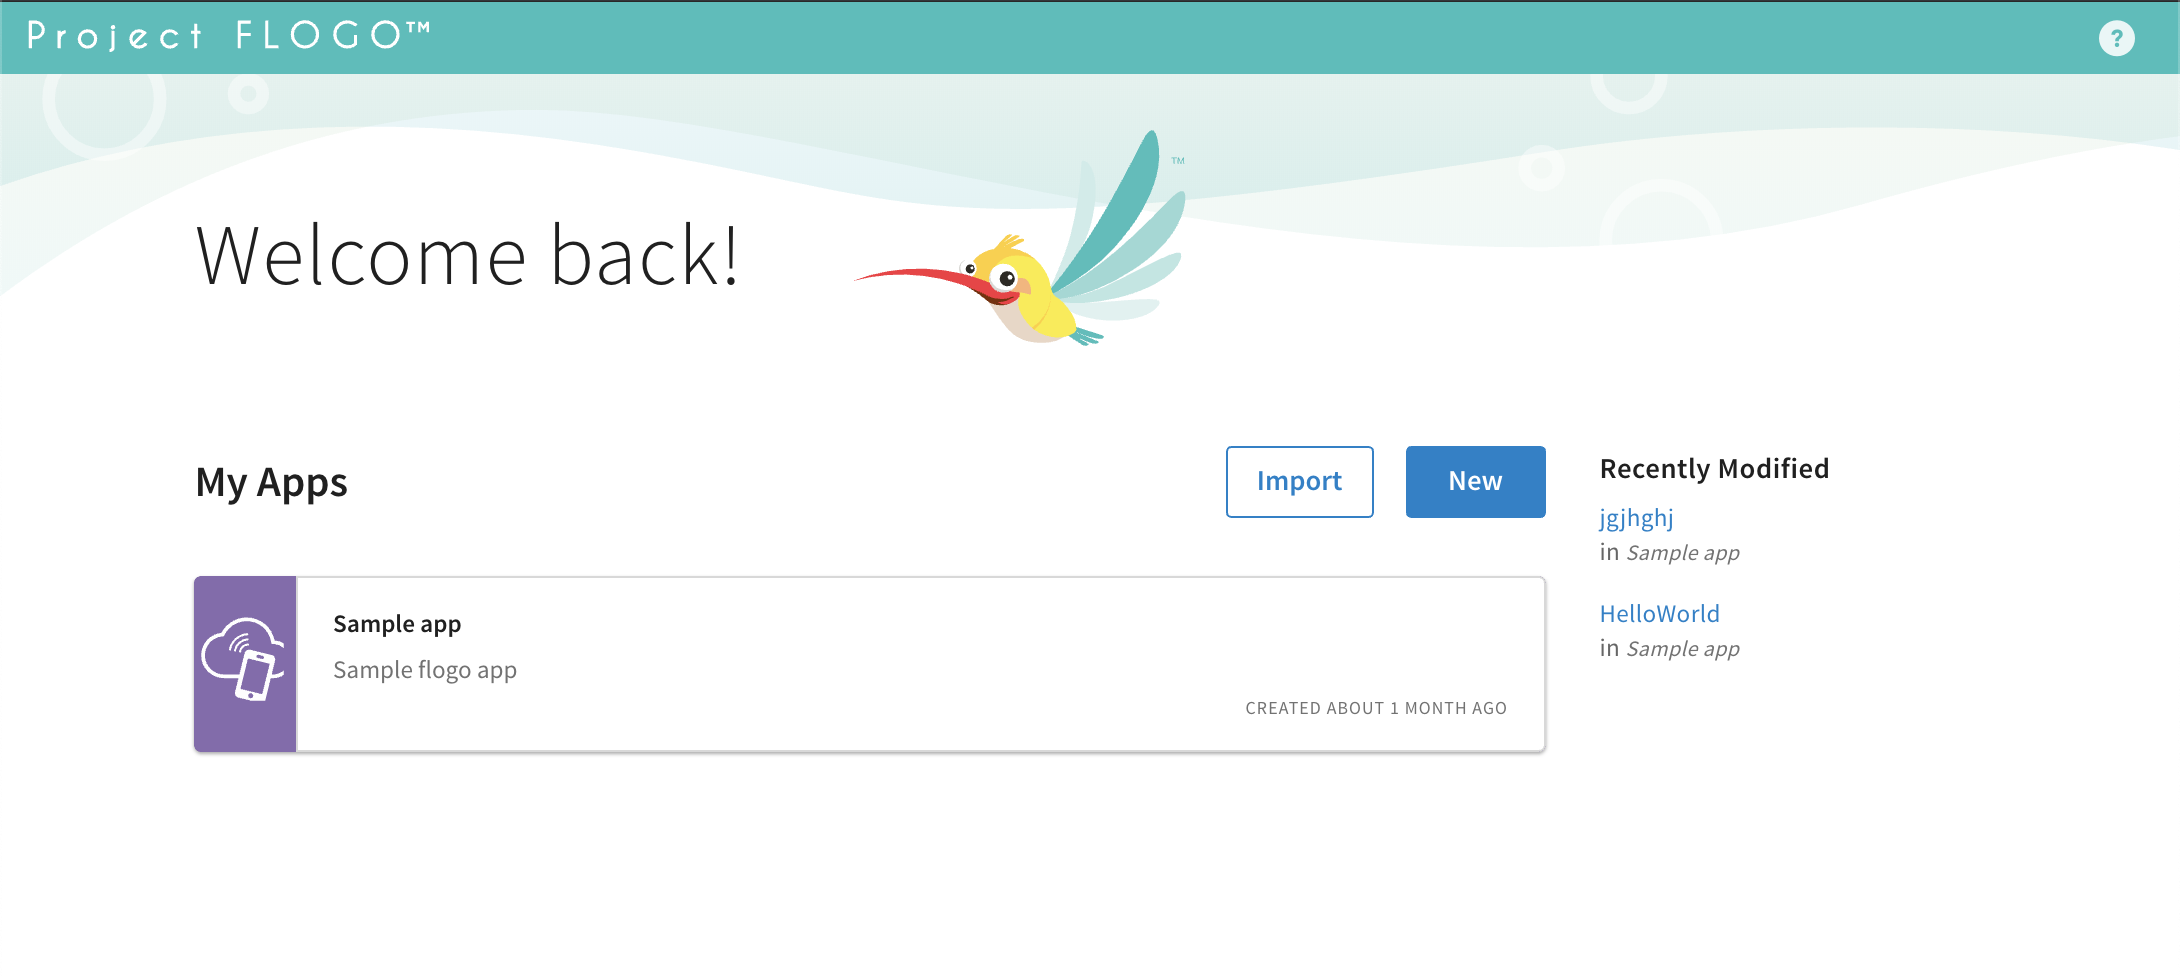
To see the Flogo Web UI, open your favorite web browser, and navigate to http://localhost:3303. You’ll see our mascot Flynn there to greet you!
Step 2: Create the app
In Flogo terminology, an app is comprised of one or more triggers and flows (actions). The app itself is really just an organizational mechanism that can be leveraged when developing microservices & functions. An app contains a set of configurations, as well as triggers and a collection of flows.
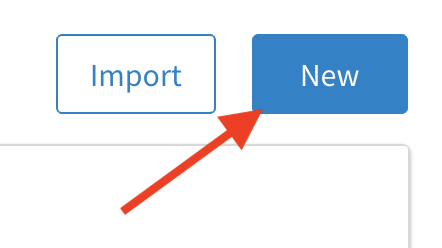
To create a new app, open the Flogo Web UI and from there, click “New” to create a new microservice and give your new app a name. Click “Create a Flow” to create a new flow and give it any name that you want. Now click on the flow you just created and to open the canvas where you can design your flow.
Step 3: Add a flow
In Flogo, a flow is an implementation of an action and is the primary tool to implement business logic. A flow can consist of a number of different constructs:
- Activities: One or more activities that implement specific logic (for example write to a database, invoke a REST endpoint, etc)
- Links: Each activity is connected via a link (Links can contain conditional logic to alter the path of a flow)
Flows, as previously stated in the triggers section, can exist without a trigger. Thus, flows operate very similar to functions, that is, a single flow can define its own input & output parameters. Thus, enabling a flow to be reused regardless of the trigger entrypoint To create a new flow you can click either the + New Flow button at the top or the Create a flow button in the middle of the screen.
No matter which you pick, you’ll be presented with a dialog to give your new flow a name and an optional description. Click Create to create the new flow and click on the newly created flow to open the editor.
Step 4: Add a trigger
Flogo is an event-driven framework. A trigger is the entrypoint for events to, as the name implies, trigger the functionality of your app. A trigger can be a subscriber on an MQTT topic, Kafka topic, HTTP REST interface or a specific IoT sensor. The trigger is responsible for accepting the incoming event and invoking one or more defined actions (flows).
To add a trigger, click on the “+” icon on the left hand side of the screen and select the Receive HTTP Message trigger.
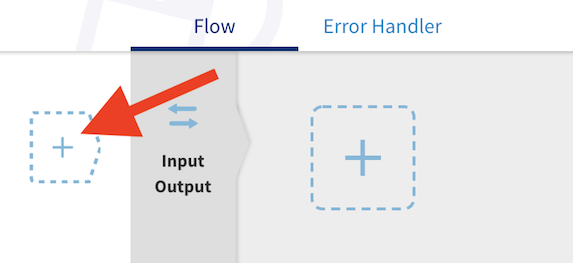
The thing you want to log comes from the HTTP request. To get that parameter into the flow, you’ll need to create an Input parameter which you can do by clicking on the grey “Input Output” bar on your screen.
In the Input tab, you need to configure the input parameter we will use later:
- Parameter name: name
- Type: string
The response to the HTTP request will be a message and the HTTP status code, and to be able to send data back you’ll need to have Output parameters. From the screen where you are now, select the Output tab and configure two parameters:
- Parameter name: code
- Type: integer
Now click on the + sign to add a new parameter
- Parameter name: message
- Type: any
Now it is time to configure the trigger to listen to HTTP messages. To start, click on the trigger and a new dialog will open with a bunch of options in the active Trigger settings tab. In this dialog you’ll have to provide:
- Port: The port on which your app will listen (set this to
9233) - Method: The HTTP method that will trigger this flow (set this to
GET) - Path: The path that will route the messages to this flow (set this to
/test/:name, the:namemeans that you can use that as a path parameter in your mappings).
You will need to map the trigger to inputs and outputs as well. In that same dialog, select the second tab, Map to flow inputs. The parameter “a.. name” should be selected. You can see a list of trigger outputs under the text area. As you have set up earlier in “Trigger settings”, we want to use name as a path parameter. Select pathParams in the trigger output and add .name or simply type $.pathParams.name into the text area.
Once you’re done mapping to flow inputs, select the next tab, Map from flow output. Click on “123 code” to map it to one of the suggested flow output also called “123 code”. You should see $.code appear in the text area. Instead of selected the flow output, you can alternatively type or copy paste $.code directly into the text area without having to select a flow output in the suggested list.
Now, still from the “Map from flow output” tab, select “_* data_” in the “_Trigger Response_” list on the left to map the output data. Again, you can directly type $.message in the text area, or select “_* message_” from the flow output list under the text area.
Finally, you can click on save and close the dialog as you have successfully configured your trigger.
Step 5: Adding activities
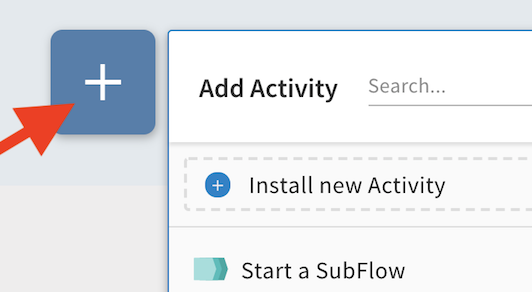
An activity is the unit of work that can be leveraged within a Flow. An activity can be any number of things and can be compared to a simple function in Go or any other procedural language, that is, an activity accepts input params and will return one or more objects on return, both input & output params are defined by the activity metadata. You’ll have to add some activities to the flow for it to do something. To add an activity click on the large + sign
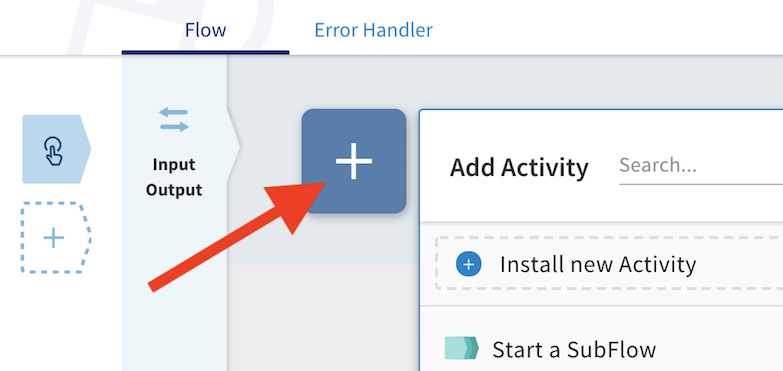
A list with all the activities the Flogo Web UI knows about will appear. From the list you can pick the “Log Message” activity (or use the searchbar to find it) and click it to make sure it is added to the flow. As you hover over the newly added activity, a cog will appear and as you hover over that thing, a menu will appear to configure your activity. In this window you can configure the inputs of the “Log Message” activity. Click on “a.. message” and type (or copy/paste) string.concat("Hello ", $flow.name) in the box (on the right hand side of the screen).
Step 6: Return data
To complete the app, add a Return activity. To add an activity click on the large + sign.
Hover over the newly added activity to see the cog and select configure to bring up the modal to configure the activity. The return activity is always the last activity in a branch and sets the values that are returned to the trigger. Click on “123 code” and type 200 in the input field to set the HTTP Response code to 200. Now click on “a.. message” and type string.concat("Hello ", $flow.name) in the input field. Finally click “Save” to complete the mapping.
Step 7: Build
Those were all the steps needed to design the flow, now let’s build an executable from it. On the main screen of your flow click on the < button on the top-left hand side of the screen. Click on build and select your operating system of choice! Flogo will compile a statically linked binary, meaning that there are no other dependencies that the executable you’re getting from the Flogo Web UI. No libraries to install, no frameworks to maintain or upgrade, just that one single binary that takes care of your flows.
Step 8: Run your app
To run the app double-click it (on Windows), or open a terminal and execute the downloaded binary. As you’ll do that, you’ll not only see the output of the log step, but you’ll see the same in your browser window as well. The URL on which our microservice will listen should be http://localhost:9233/test/:name (or might be different if you made changes in the previous steps). If you’re running it on your machine you can open a browser window and go to http://localhost:9233/test/flogo to see what the output was (spoiler alert: you’ll see "Hello flogo" in your web browser). To stop your app simply close the terminal window in which you started the app or press ctrl + c